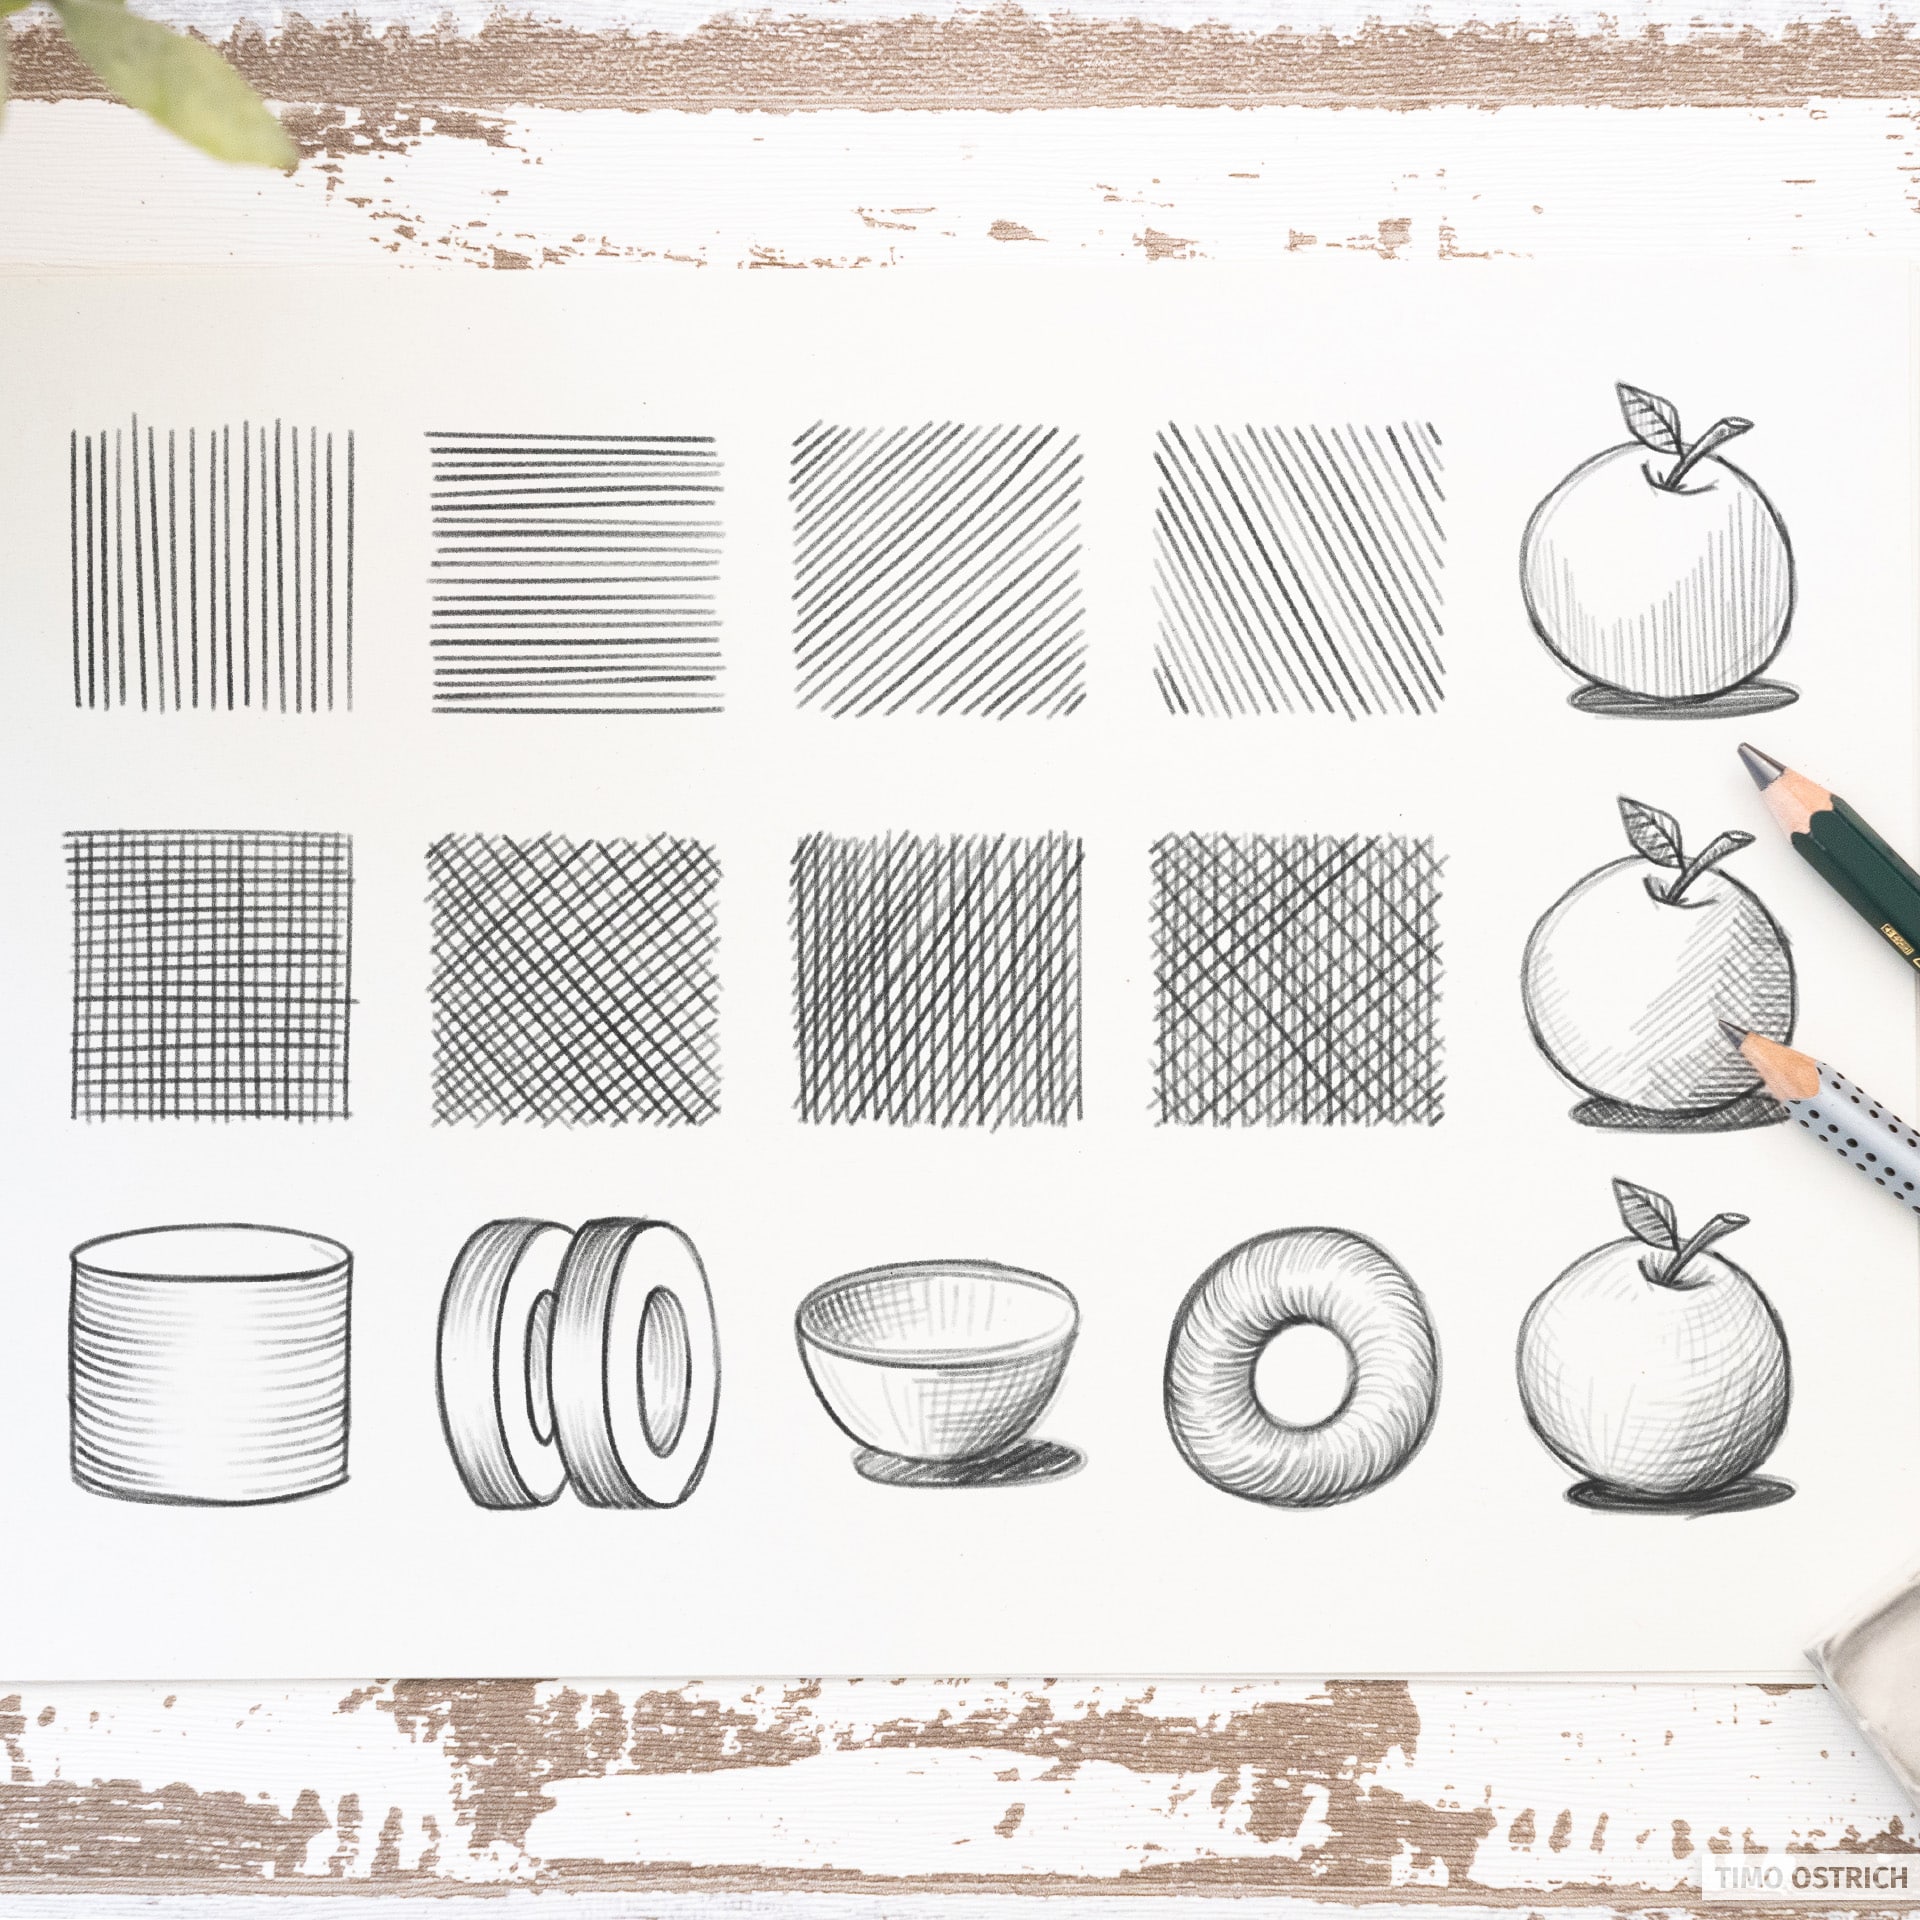
A draftsman’s best friend is hatching, isn’t it? Its range spans from simple and quick to complex and detailed. Proper hatching lets you render tonal values and three-dimensionality in an incomparable way. I love it!
Which variants of hatching exist, how the individual techniques work and how you eliminate typical sources of error is what I’ll show you in this article.
By the way: hatching techniques are also ideal as a warm-up exercise before drawing the actual object.
Sketches with personality
In contrast to blending, hatching usually looks somewhat coarser and more abstract. This results in an incomparable look with a character all of its own. Not least, the way you hatch even reflects the personality of the person drawing and can thus become a kind of signature.
Parallel hatching
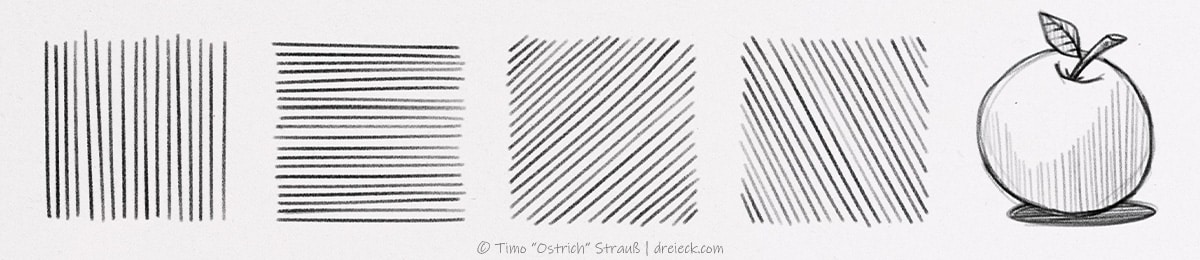
The visually simplest form of hatching is also often referred to as “simple hatching“. This supposedly easy technique, however, comes with a challenge right away: drawing parallel lines! Sounds easier than it is.
No matter how loose the lines are meant to look in the end, practice is required here. Hatching with parallels makes your drawing look especially light and gives it a strong character. Letters, too, can be filled very effectively with parallel hatching.
Cross-hatching
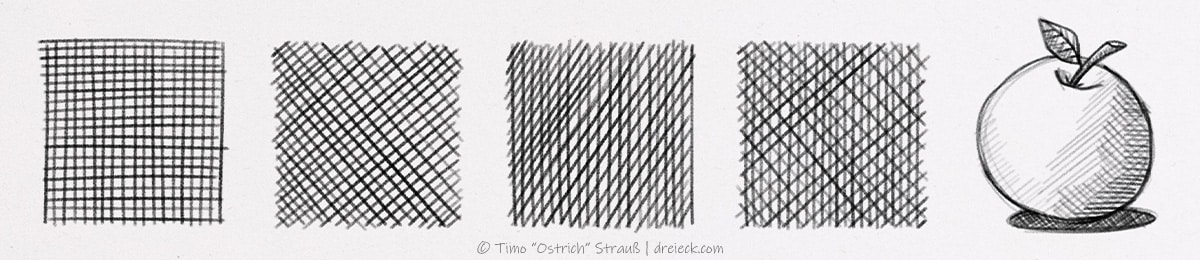
Here, too, the name says it all. With cross-hatching, the parallel lines overlap at a certain angle. It is essentially like laying two or more parallel hatchings on top of one another.
The basis here is often a 90° angle – but all other overlap angles are possible as well.
Contour hatching
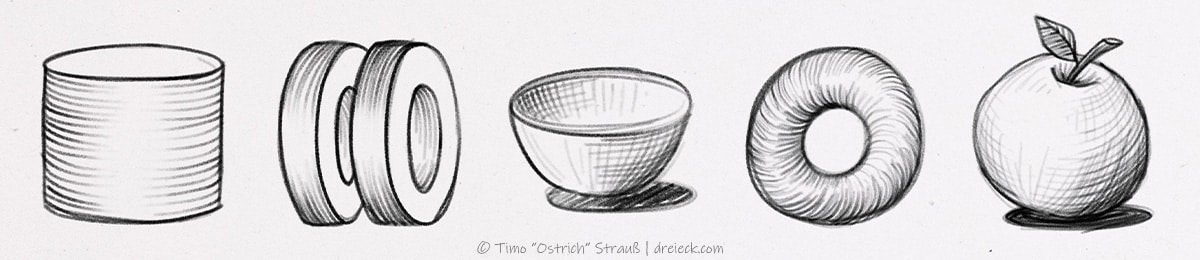
To reinforce the perspective effect of a sketch, you try to align the parallel or cross-hatching with the edges of an object. However, that only works with relatively straight-lined objects.
If you want to hatch round objects, you reach for another technique: contour hatching. Here your lines follow the shape of an object and thus create three-dimensionality. This type of hatching is also called contour stroke or contour-line hatching.
Circular hatching
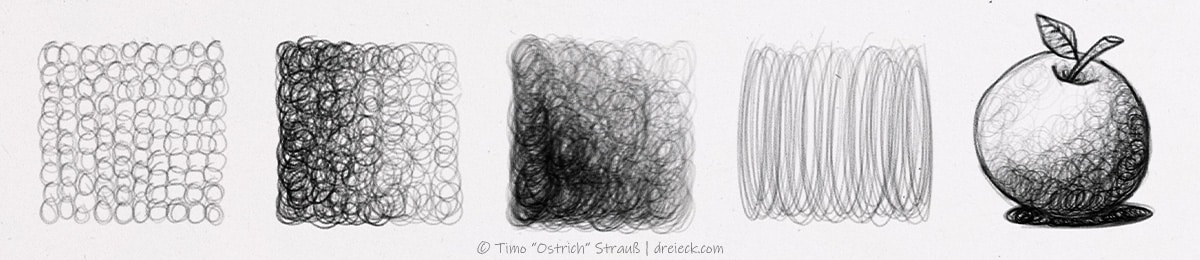
Circular hatching (also known as circulism) stands out from the classic forms of hatching. With it you create a completely different structure to define the surface of your object. Set closely together, circular hatching is also suitable for creating relatively soft transitions between different levels of brightness.
Scribble hatching
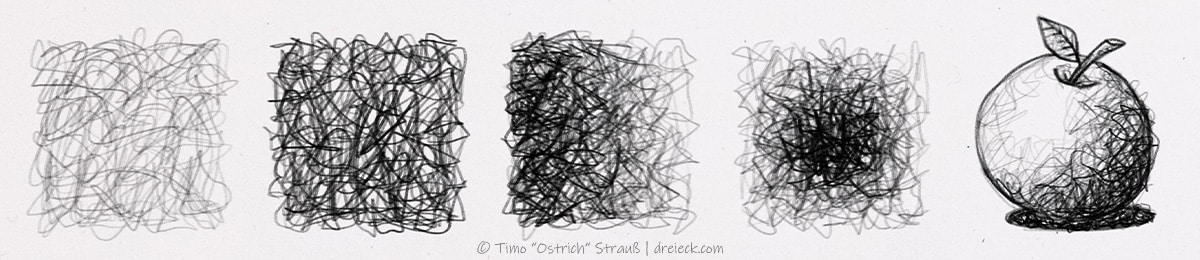
The term “scribble hatching” is certainly not set in stone – but it illustrates very nicely what it is about. With this type of hatching we forget all systems and arrangements and simply scribble away merrily. Admittedly – a bit of rational thinking is still necessary, because the number of overlaps leads to different tonal values.
Creating different tonal values
Hatching is a great technique for creating different tonal values. This way you strengthen the perspective effect of a drawing not only by emphasizing the structure of an object, but at the same time you have the possibility to visualize light and shadow.
You influence the tonal value of your hatching through various parameters:
- The spacing of the (parallel) lines
- The number of overlaps
- The weight and width of the line itself
In combination, this results in a multitude of options for hatching objects in your drawings.
Taboo: exact hatching?
As a hobby artist, one likes to portray loose hatching from the wrist as the method of choice. Aids such as a ruler or set square are said to be unnecessary and unworthy of an artist.
Here I happily disagree, because in art there are no obligations!
For hatching this means: you can absolutely draw it with a set square as well. This leads to particular precision and evenness, as often found in architectural drawings, for example.
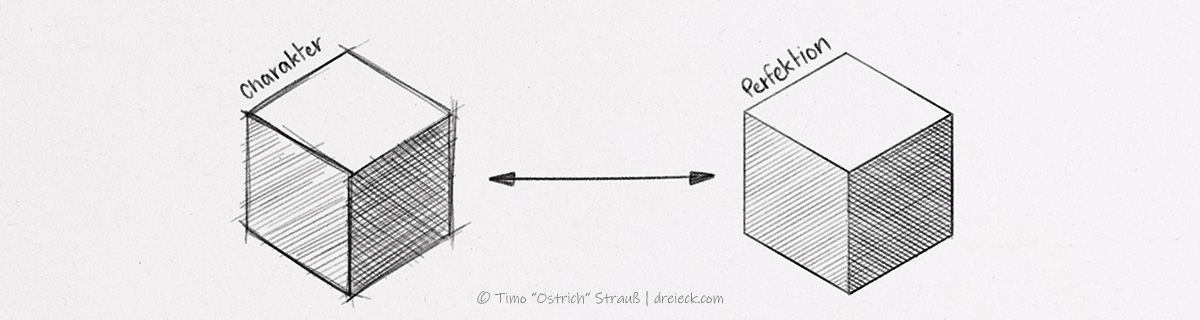
Through exact hatching, however, the looseness and the simple character of a drawing are lost. So, as always, the rule is that you adapt your technique and approach to the goal of your drawing.
The right hand and arm posture
Finally, let’s come back once more to loose line work. How do we best achieve it now?
You reach a good starting position by dividing the work between wrist and forearm across two axes. From the wrist you draw the strokes lengthwise, and the arm ensures that you can keep shifting the lines further along.
Hatching at a 45° angle can usually be drawn very comfortably, since it comes very close to our natural wrist posture when drawing.
Tip: Of course you may rotate your paper accordingly in order to take up a comfortable position for hatching.
Speed, too, significantly influences your hatching. If you draw the strokes too slowly, they lose dynamism and become wobbly. If you are too fast when hatching, the spacing becomes uneven and you tend to draw over adjacent shapes.
Once you have found your pace, hatching becomes really rhythmic and almost meditative (similar to Zentangle).
Last but not least, as so often, it is practice that leads to success. Hatching and drawing in general is frequently a very delicate process that engages many small muscles and has to be coordinated by the brain.
This process can be trained and improved further and further – but only through constant practice! For you that means: Stop reading and grab a pencil for your first hatchings. For example by drawing a book or a few mountains.
Questions and answers
Hatching is a pattern of lines whose purpose is to fill an area. With hatching you can render different shades of grey. All parameters (line weight, opacity, angle, spacing) are variable.
The typical types of hatching are parallel hatching, cross-hatching and contour hatching. In addition there are circular hatching, scribble hatching and stippling (dot hatching). Combinations are possible as well.
With hatching you can create different tonal values. It helps to visualize light and shadow or to emphasize the shaping of an object. It also gives a drawing a special character.