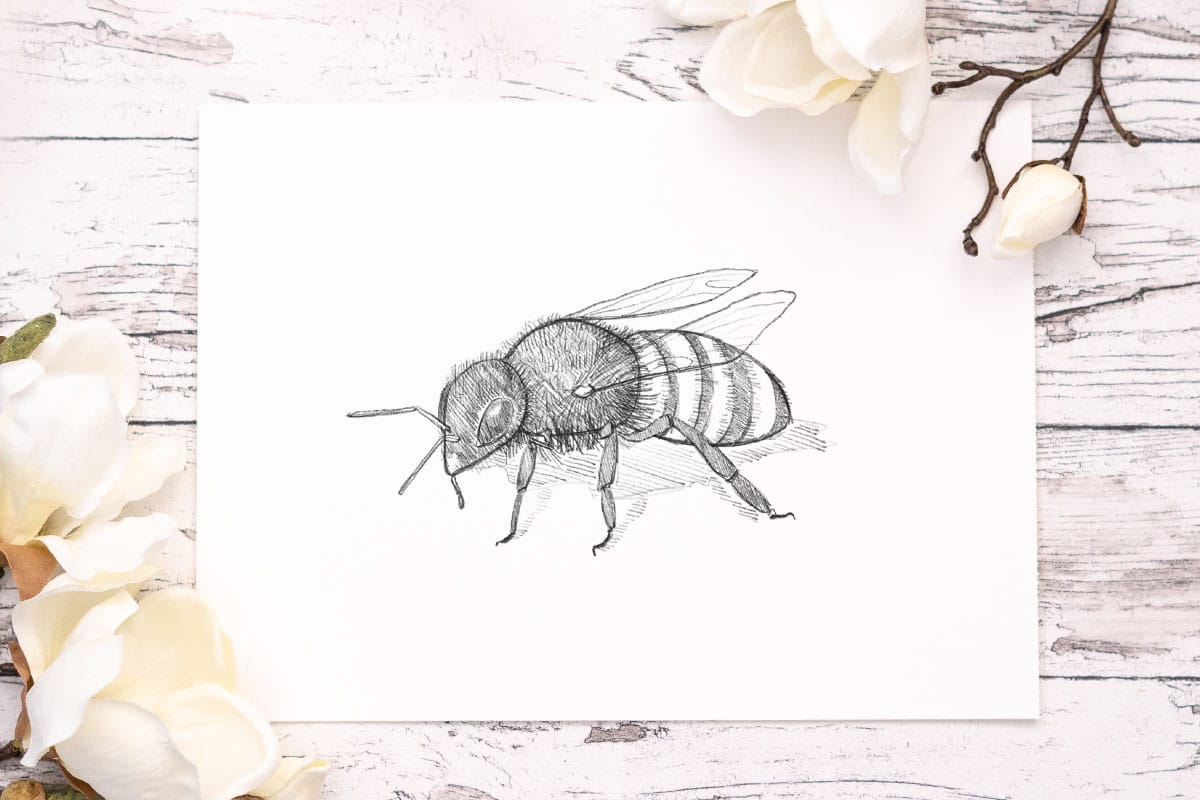
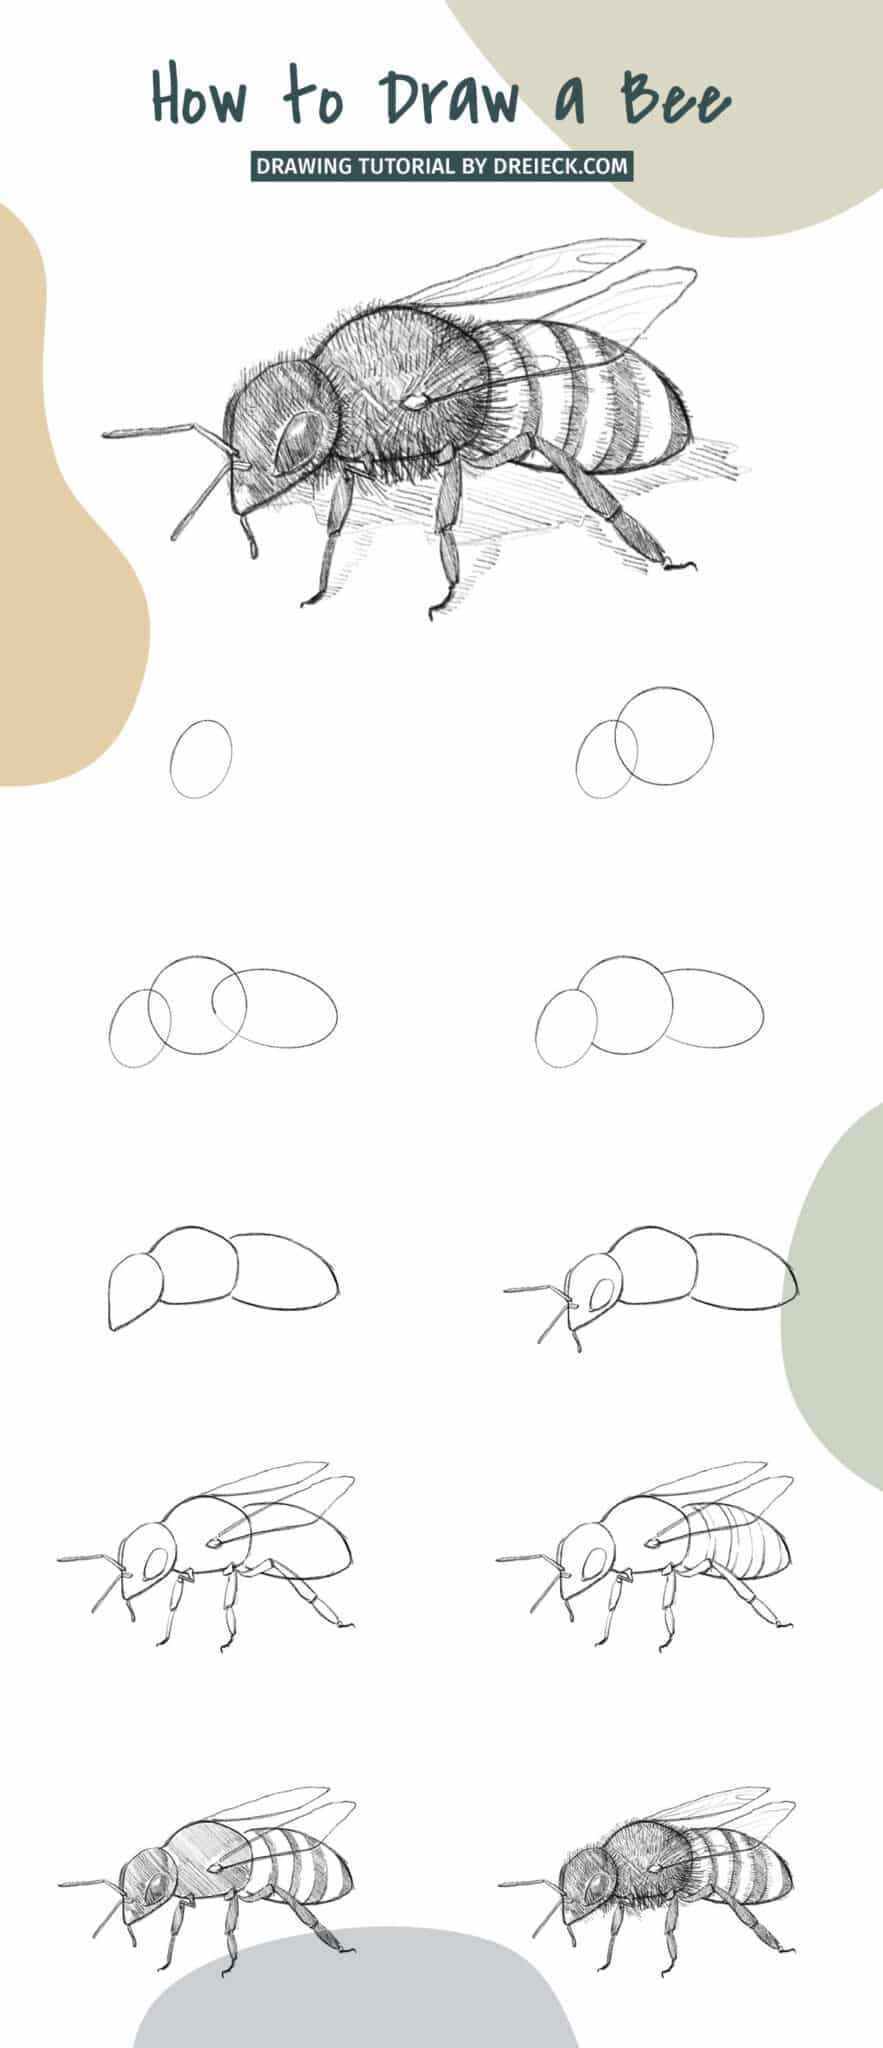
This tutorial will walk you through the steps to create an easy yet realistic bee drawing. You will learn how to draw a bee in a few simple steps.
We took the most commonly seen type of bee because it has a familiar shape and is quite easy to draw. It’s probably the best example of learning how to draw a bee.
You need to pay attention to the body composition of the bee by looking closely at the angles we applied in this tutorial. We will draw our bee with a view from the side showing all parts of the bee.
Bees are insects that have many benefits in the system on earth. We must protect the environment so that their habitat is maintained.
Contents
- 1 Step 1: Start with an oval
- 2 Step 2: Drawing another oval
- 3 Step 3: Adding a bigger oval
- 4 Step 4: Combining the ovals
- 5 Step 5: Refining the shapes
- 6 Step 6: Drawing the head
- 7 Step 7: Addings the wings and the legs
- 8 Step 8: Curved lines for the abdomen
- 9 Step 9: Tonal values
- 10 Step 10: Adding some details
- 11 Step 11: A simple drop shadow
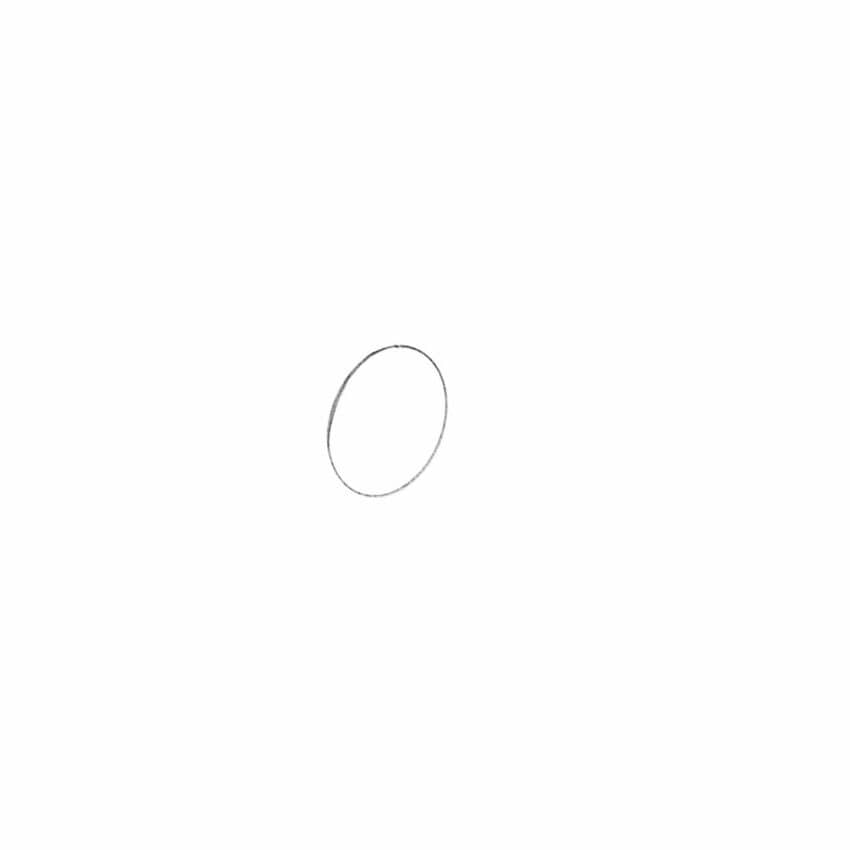
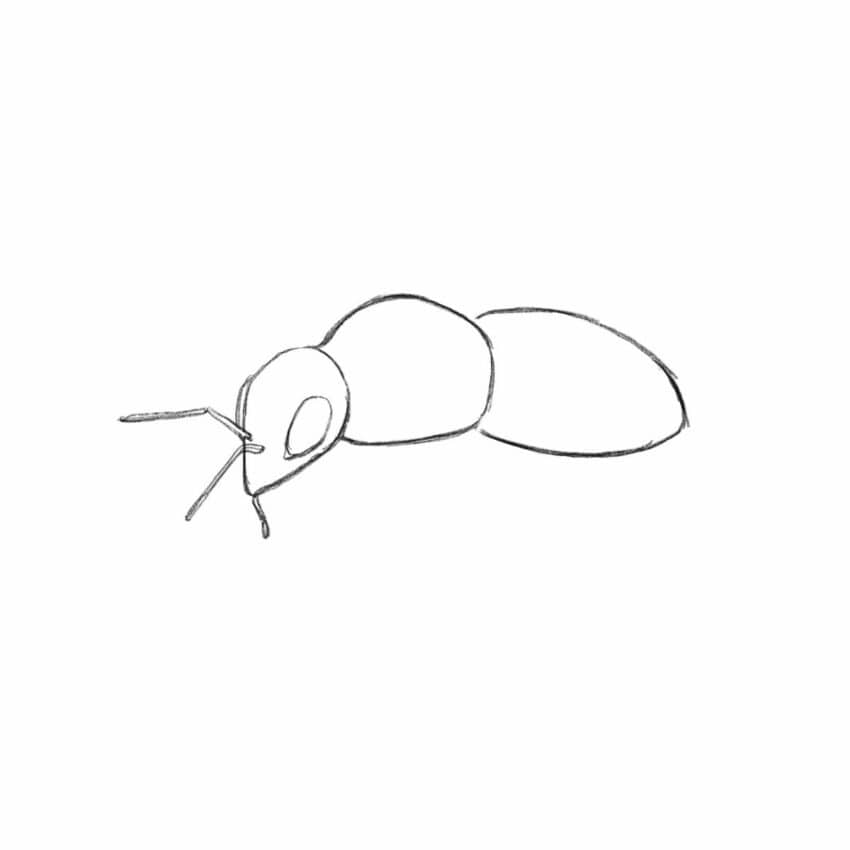
Step 1: Start with an oval
Sketch one oval that will be the part where you will place the rest of the bee’s body. After drawing it, we will get a reference for the other part of the drawing. It will make the next steps easier.
Step 2: Drawing another oval
We’ve finished drawing the oval that represents the bee’s head. You only need to draw two more oval shapes now. The second oval has to be a little bigger than the first one.
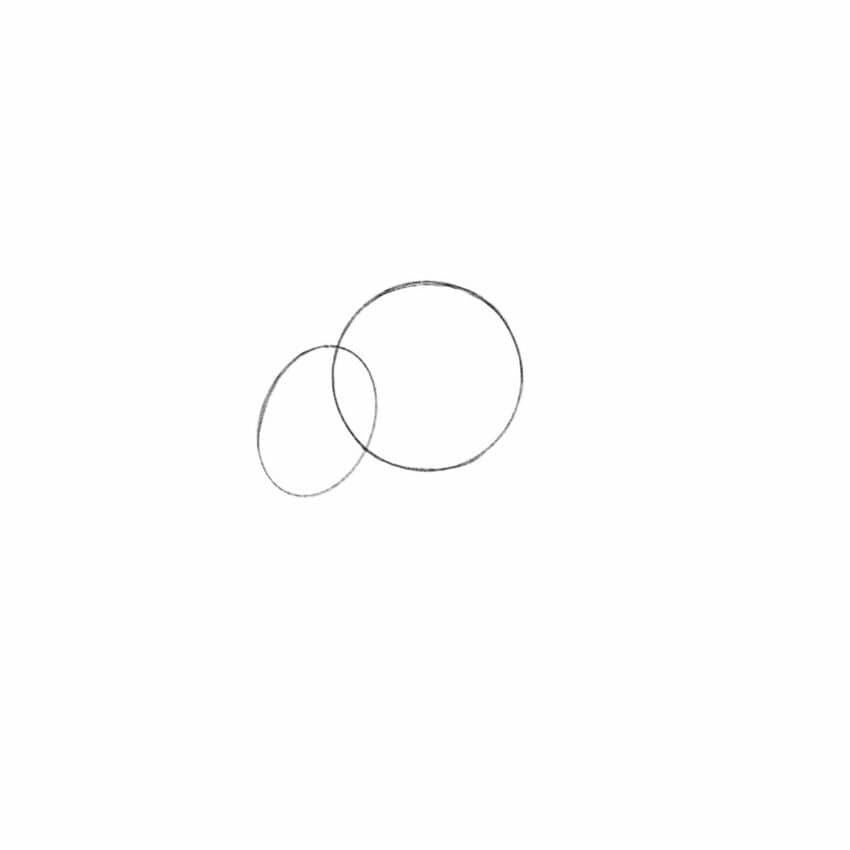
Step 3: Adding a bigger oval
Finally add one more oval to our bee drawing. It will be the chest part that we will put all legs on later.

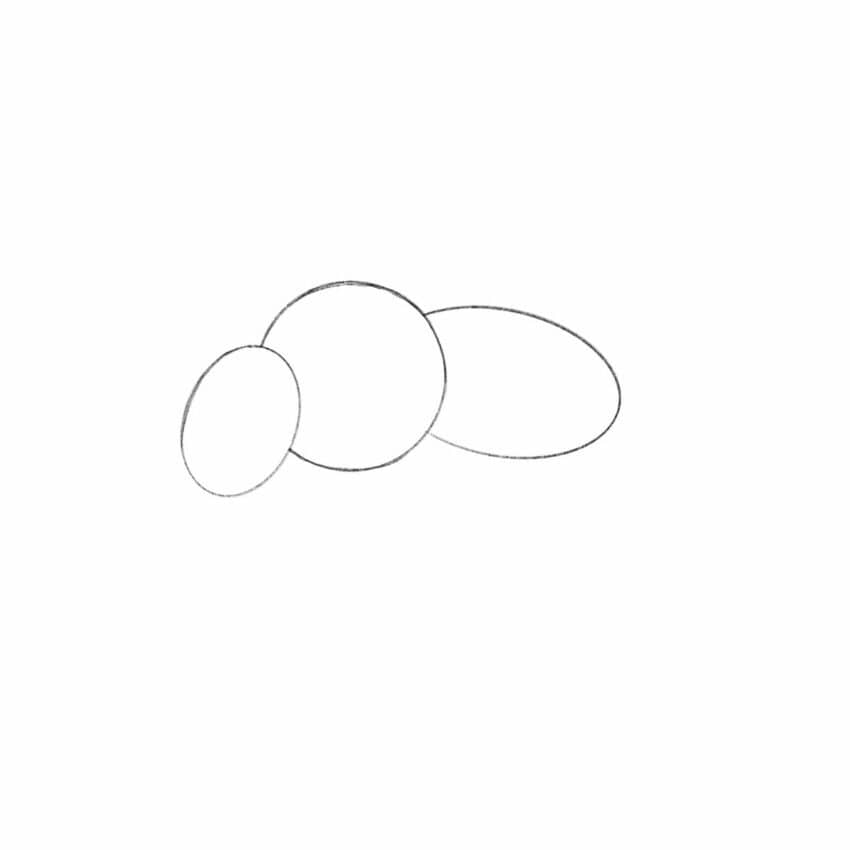
Step 4: Combining the ovals
After finishing the three ovals, you can see the basic shape of the bee. In our next step, we will combine the ovals by erasing some lines.
Step 5: Refining the shapes
We’ve got the basic shape of the bee from the head, chest, and belly. The next step is to make it look more natural and smooth. Therefore you have to refine the basic shapes a little.

Step 6: Drawing the head
Our next step is to start drawing the other parts. We will start from the head by drawing the mouth.
The mouthpart is a proboscis-like shape that has a function for plant pollination in our ecosystem. They do that by brushing away pollen while sucking nectar from flowers. When going to collect nectar, bees use their pointed proboscis. At this step, we will draw it.
After drawing the mouth, we move to the antenna using two simple curved lines, attaching the antenna to the left side of the head, just below the center point.
The next step is to make two eyes by drawing oval shapes and curved lines on the head. The method is easy. You only need to make a curved line on the left of the head, then draw an oval shape on the right.
Step 7: Addings the wings and the legs
In the next step, we will draw the wings on the bee’s chest or back. We will draw the wings with two long oval shapes.
After that, move on to the legs. On the front legs, we’re going to make it look thinner and for the middle a bit thicker, and bold on the ends. Once we have finished detailing the legs, we will get a proportional bee’s leg shape.
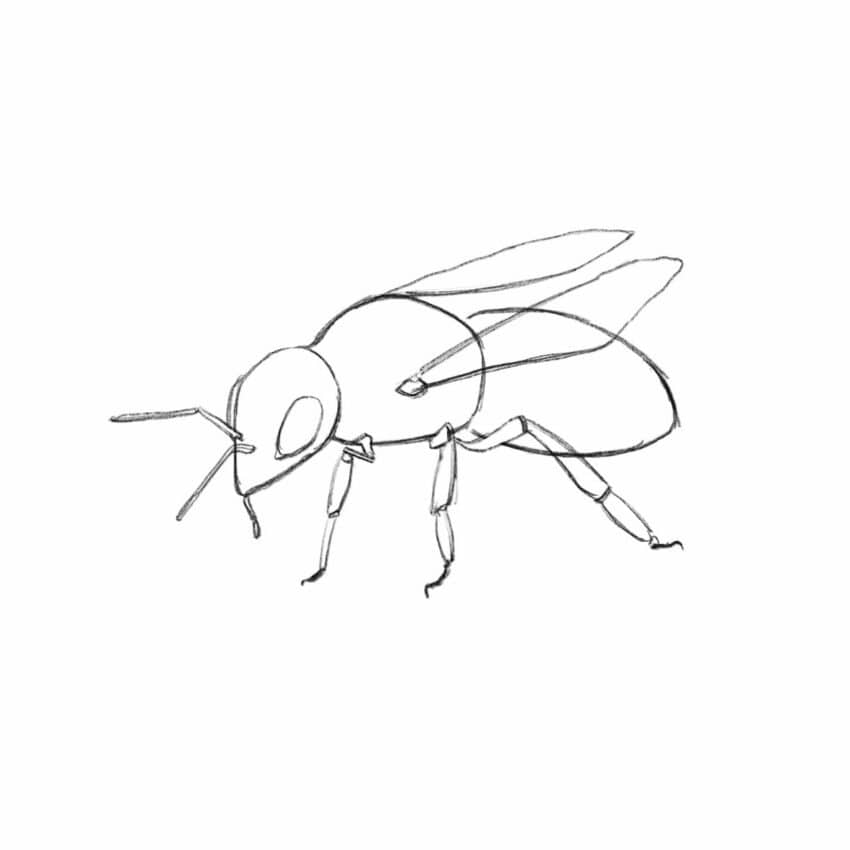
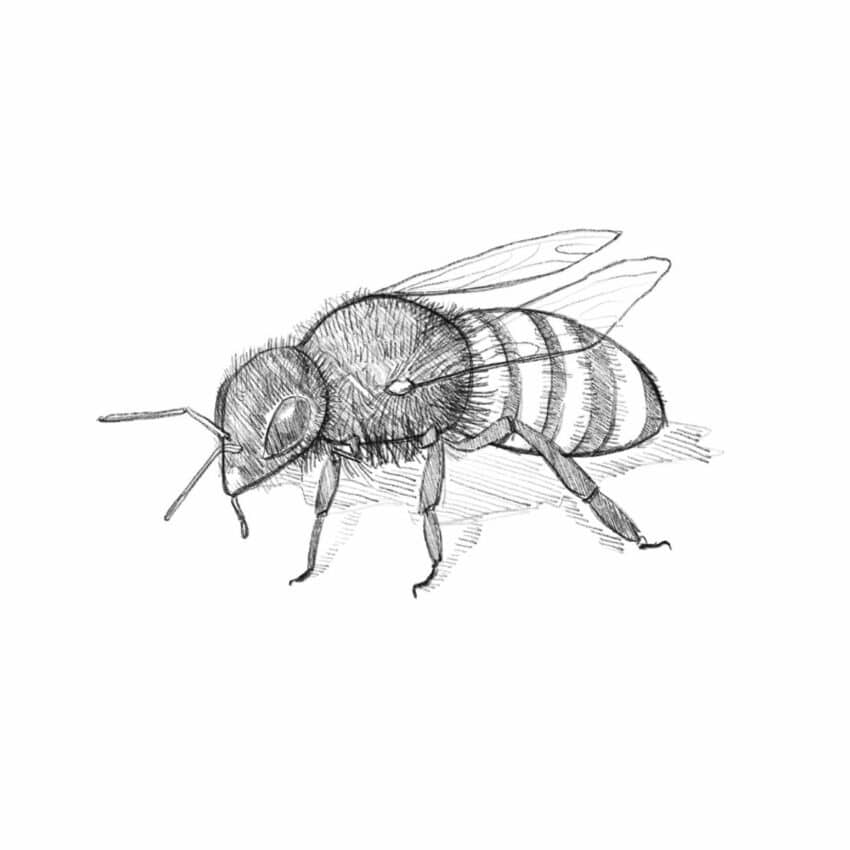
Step 8: Curved lines for the abdomen
Before starting to detail the body, we will add the curved lines on the bee’s abdomen. This part is also called spiracles. Bees do not breathe through the nose but through their bodies’ complex structures of the trachea and air sacs.
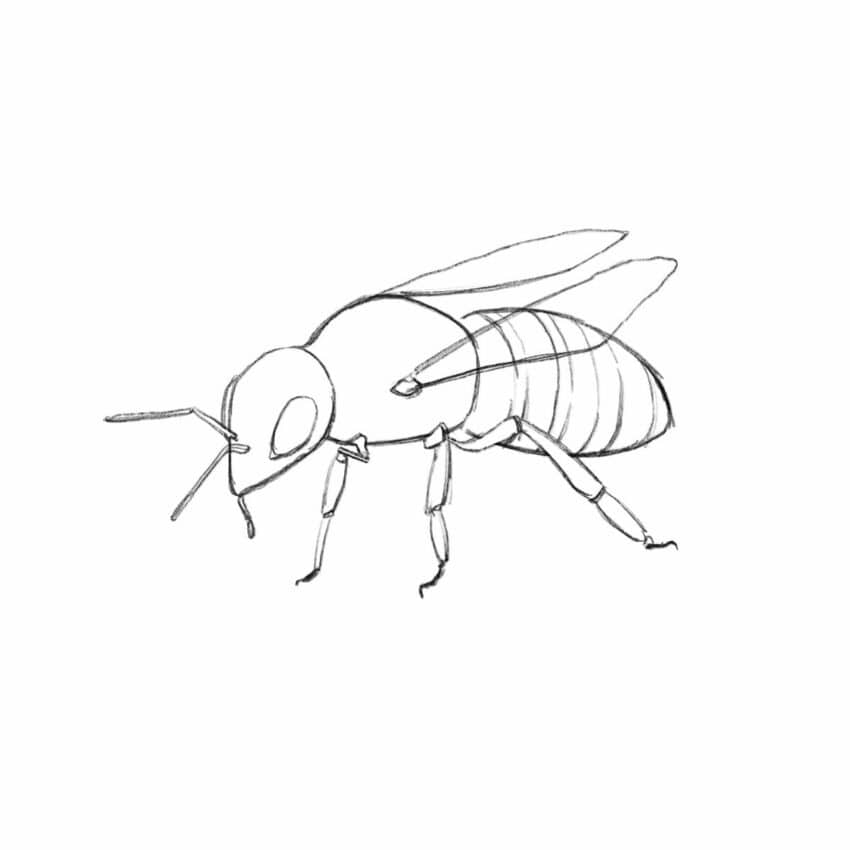
Step 9: Tonal values
After we have finished drawing the basic shape of the whole body of the bee, we will start the detailing stage. We will move to some easy detailing steps.
Let’s start with the eyes. Shade on the eyes and add white indentations in those parts by deleting or using a white pen. It’s to make the bee’s eye shape more visible. Next, we move to shade the head, chest, and legs. After that, start adding details to the bee’s abdomen. There is something unique about it. We will see color differences as patterns similar to zebras.
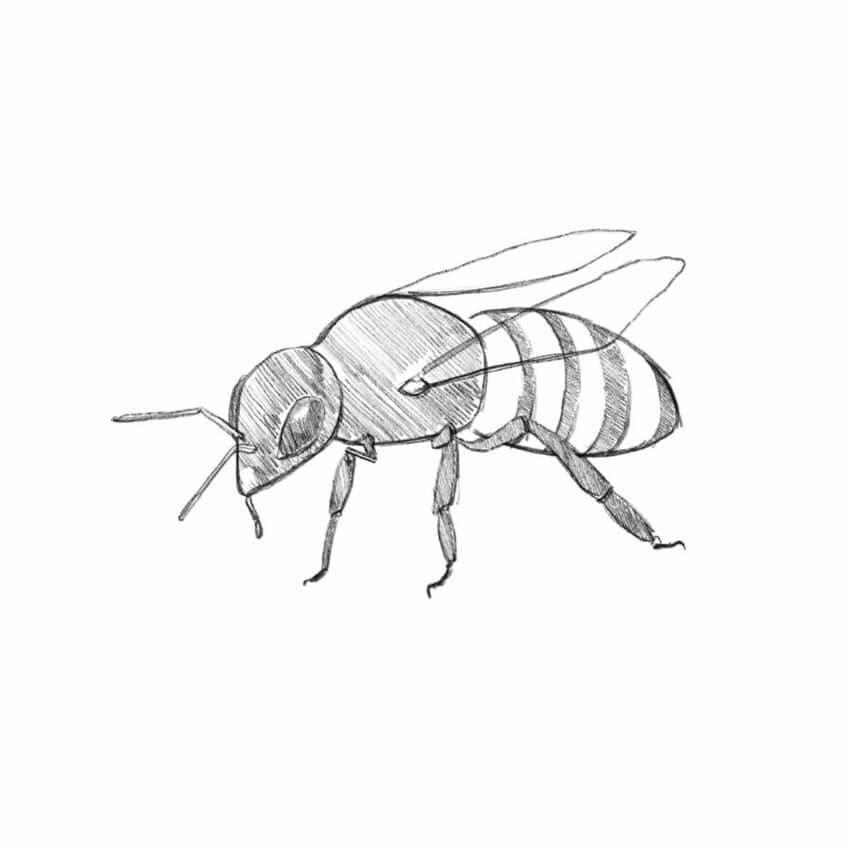
Step 10: Adding some details
After finishing the tone value step, we will start detailing all parts of the bee’s body. First, start on the head. We are going to add a thin line called the spindle hair. These steps are important to make our bee drawing look more natural.
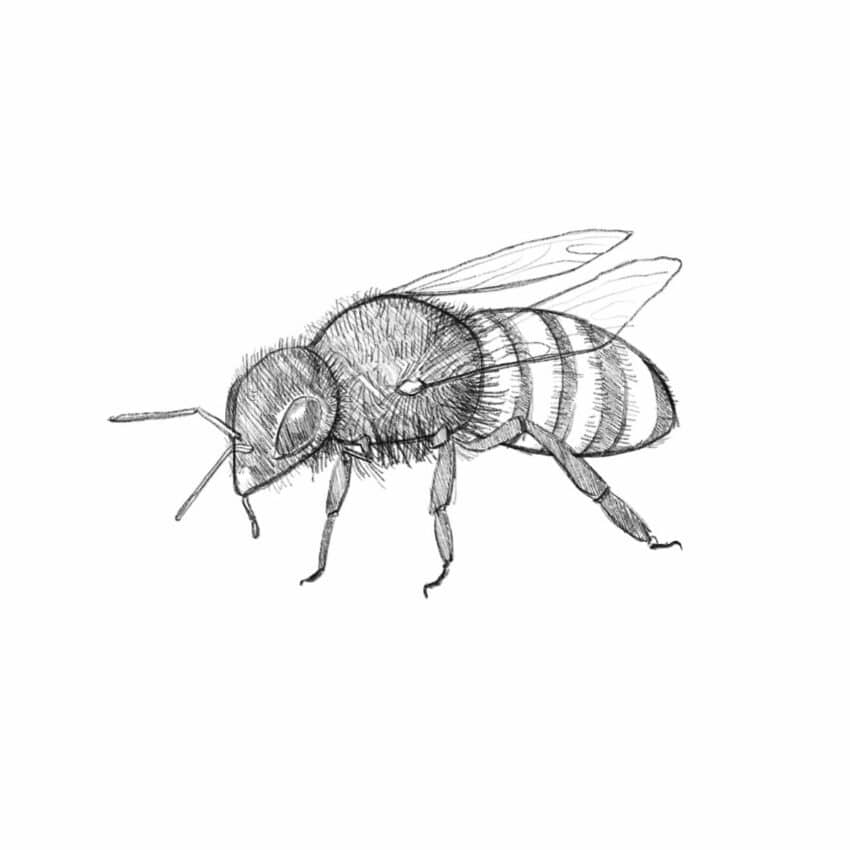
Step 11: A simple drop shadow
In this final step, we will add another little detail to make our bee drawing look more realistic. You only need to add a little drop shadow on the sides of the bee’s body. This shadow makes the bee really look three dimensional.
Alright, this was how to draw a bee! It may take a little patience because it requires precision when drawing the shapes. Hopefully, with this tutorial, you can draw some beautiful bees by yourself. Good luck and always keep practicing.
This is great I had a drawing compaction in my class and won 🥇
That’s awesome, congrats!
I had the best bee book and now I have to share it with someone
now I have to make a humming bird book and share it with someone
great so cool
I have to this for an opinion writing. It’s about pollinators with bee on it. And did you know ants are pollinators? you can search it up if you like
this drawing help me to complete my EVS MDP and I love this drawing so thanks for this drawing
Perfect! 🙂
I love how it explains it all step by step W drawing
I love my drawing and the fact you explained
Thank you.I needed it for a project.