
It’s no surprise that sunflowers are one of the most beautiful flowers, aren’t they? In today’s tutorial, you will learn how to draw a realistic sunflower using some simple steps. A blank sheet of paper, a pencil, and an eraser are all you need to start drawing.
Contents
Step 1: Starting with three circles
We’ll begin the drawing by creating some guidelines, which will make it easier for us to draw the sunflower.
A common sunflower has a large round head, which is surrounded by several layers of bright yellow petals. So we’ll start the flower by drawing a large circle first. Now make one smaller circle within the first circle and draw a third circle within the second circle.
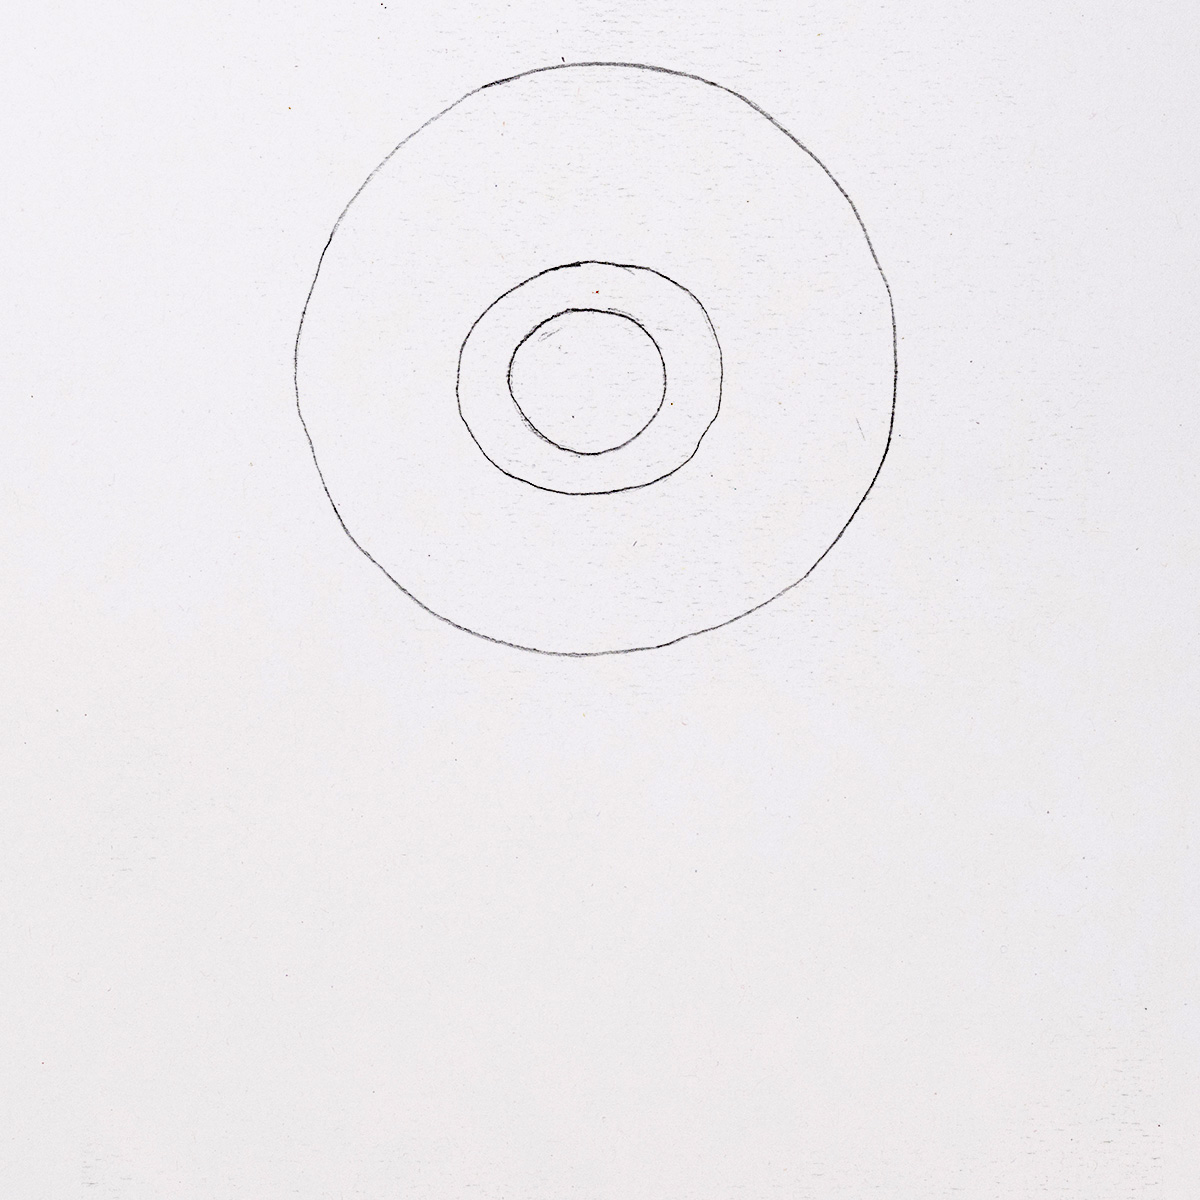
Keep the lines as light as possible because we will erase some of them later.
Step 2: Drawing the first layer of petals
A sunflower’s longer petals (called ray florets) are predominantly oval-shaped. These petals surround the centre of the flower.
So first, draw an oval-shaped petal from the second circle to the outer one. Now add some more petals around the centre by following the same step. We have to make the tip of the petals slightly pointy for a more realistic look.
The shape of the flower petals does not have to be a perfect oval or similar to each other. Make the petals vary in shape and size, so that they look more natural.
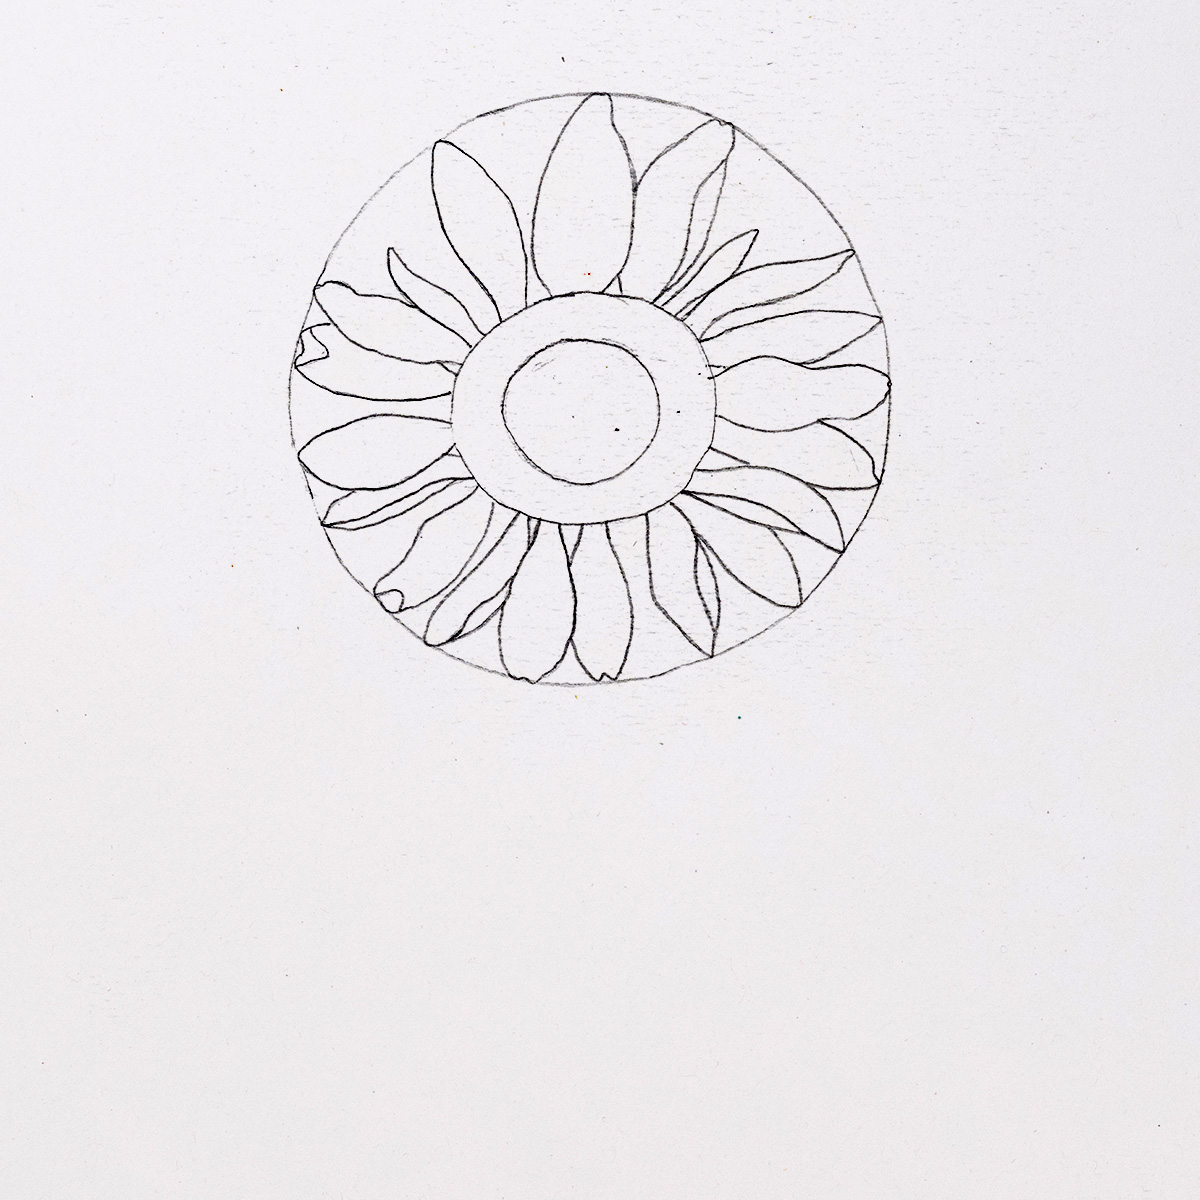
- You can make the tip of some petals slightly wavy.
- Make some petals fold to the back and front.
- Add some smaller size petals in front of the others.
Step 3: The outer layer of petals
Once we finish adding the first layer of petals, add another layer of petals backside of the first layer.
If you see any space between the first layer of petals, draw some more petals in different shapes and sizes to fill the gaps so that our sunflower looks fuller. These petals will only be visible partially, as they will be behind the first layer.
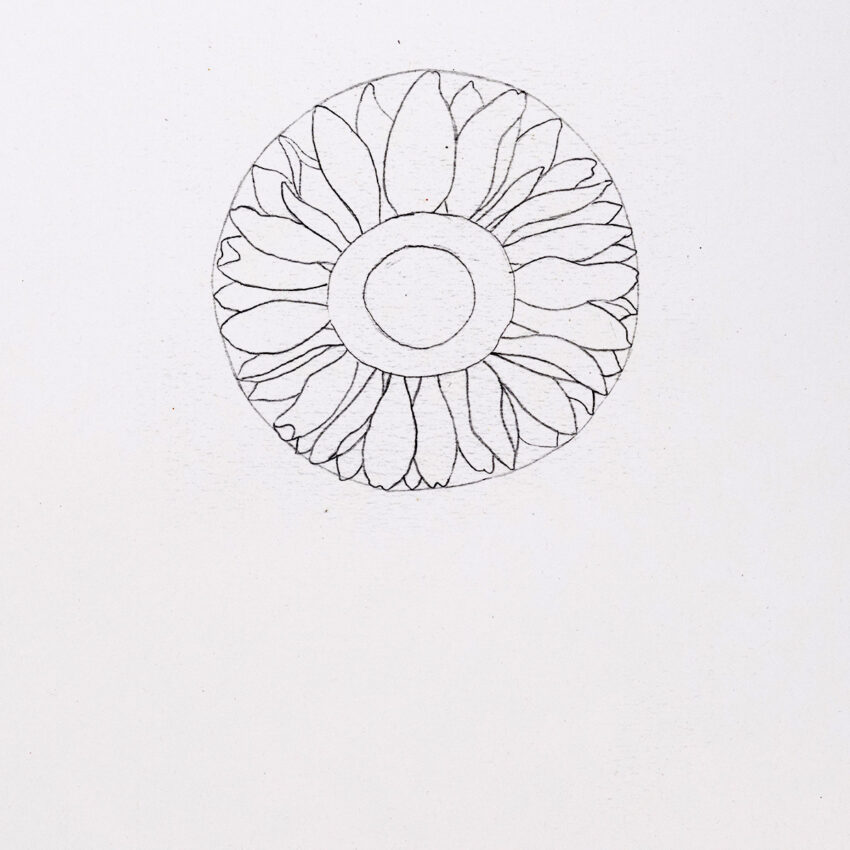
After that, you can erase the outer circle that we have made before.
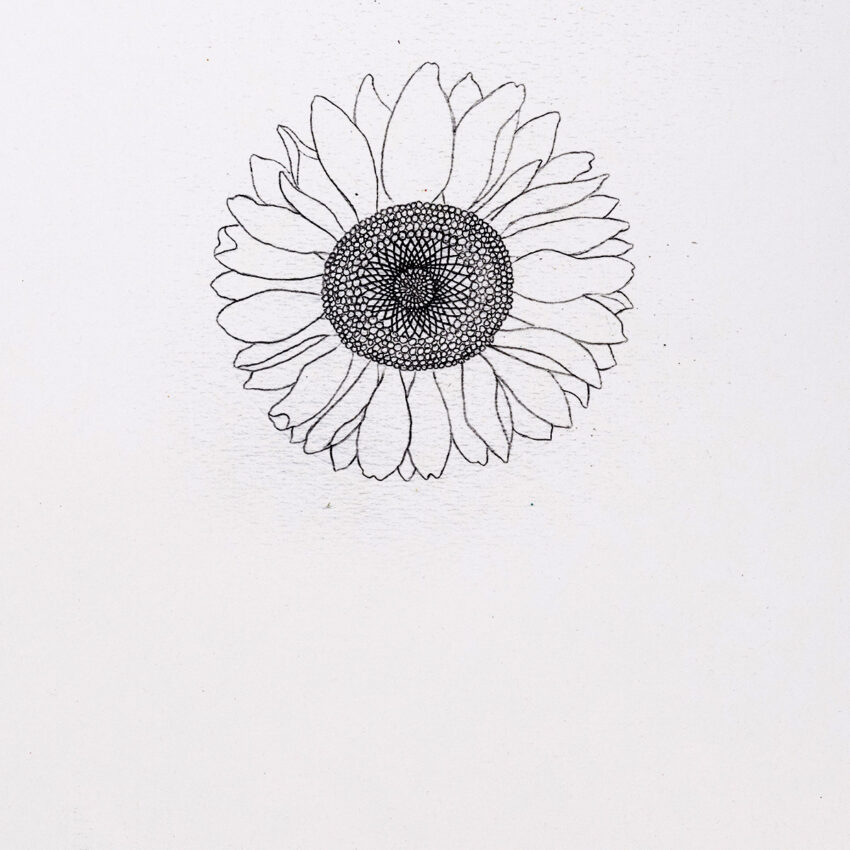
Step 4: The center of the sunflower
The center of a sunflower is made up of more than a hundred small flowers (called disc florets) packed closely together.
Let’s start with the outer circle first. Erase the outline of the first circle slightly and draw some smaller rounds around the line. Make the circles bigger towards the centre. Add another small circle within the second circle. Now draw some curved lines, towards the right side, from the first circle towards the second circle.
Again draw some more curved lines towards the left side, from the first circle towards the outer one. After that, we will get a web-like pattern. Make sure to draw the curved lines close to each other. Now darken the small shapes one by one.
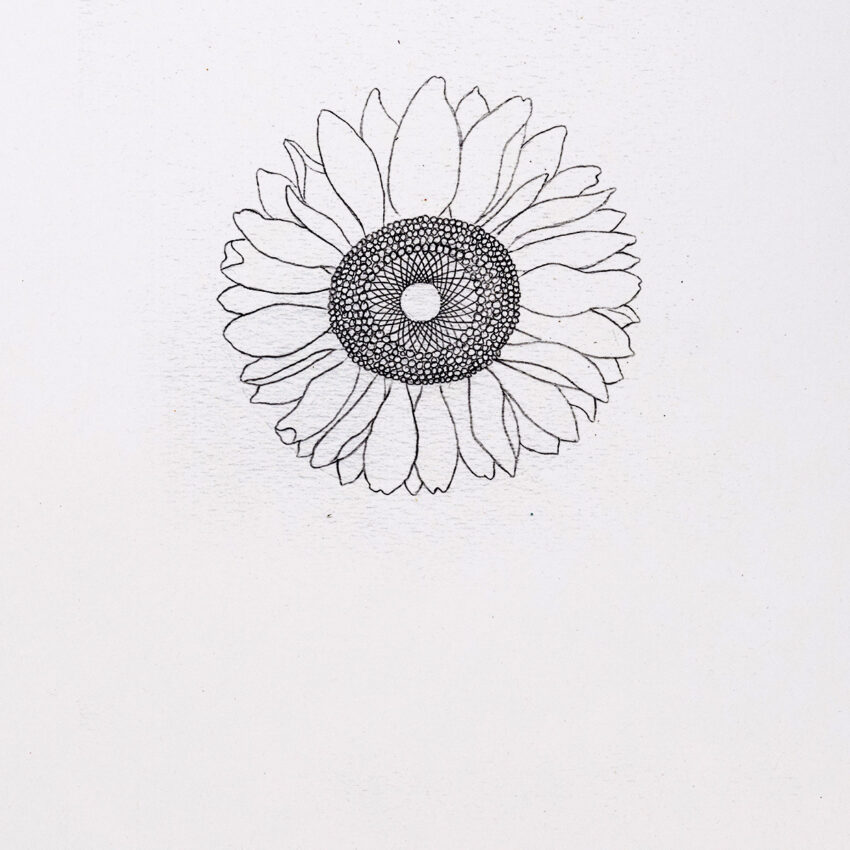
Next, draw some small oval shapes along the outline of the inner circle. Now start to make the ovals smaller towards the center.
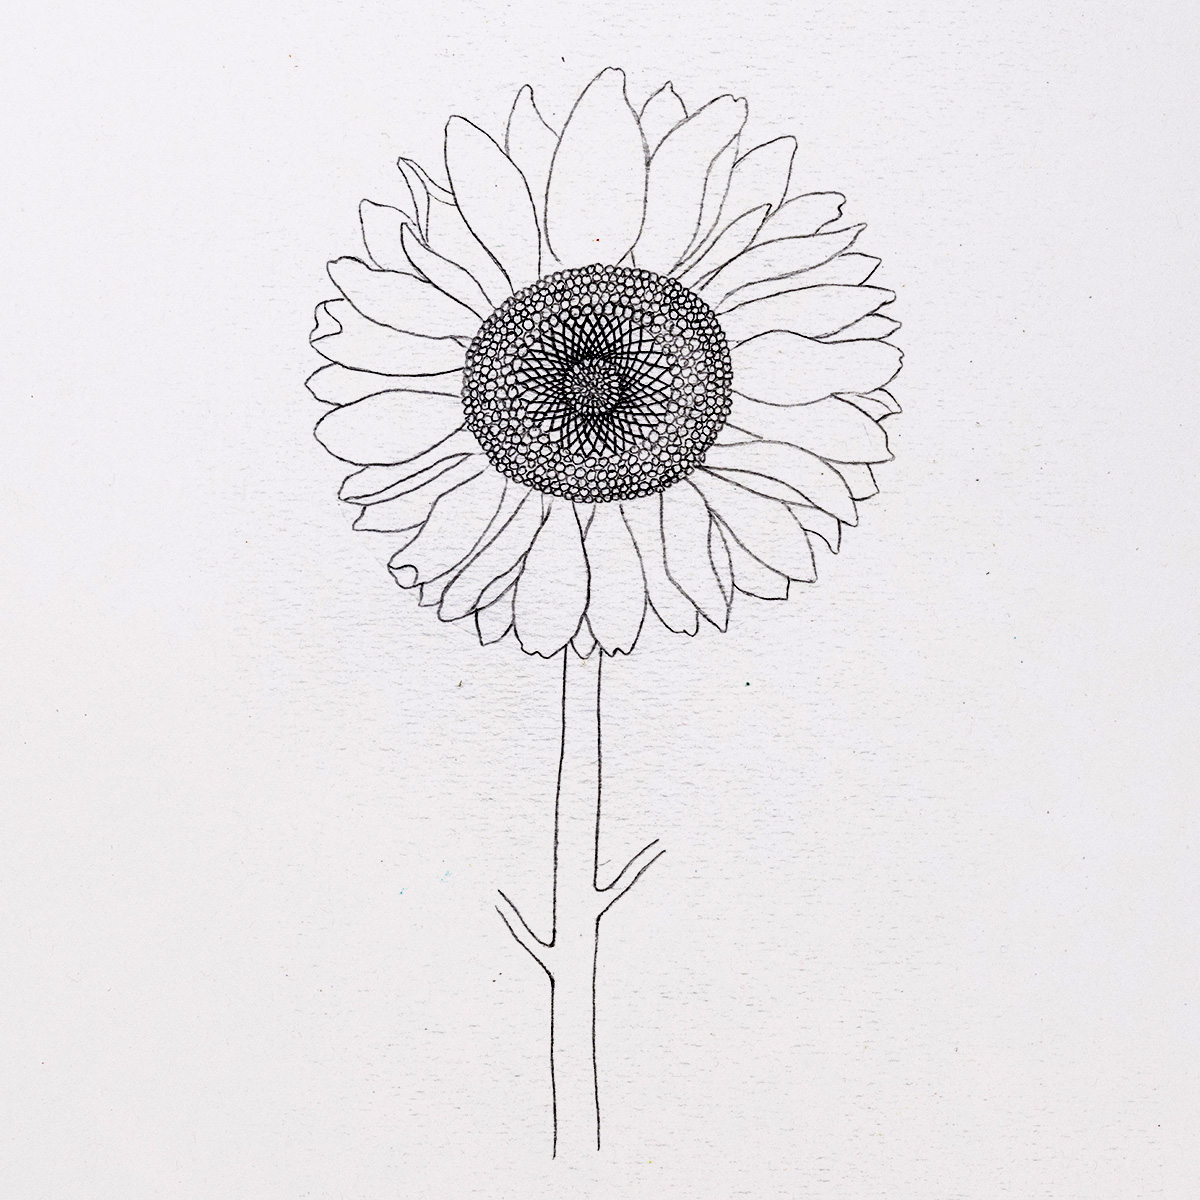
Step 5: Adding the stem
Next, we’ll draw the stem. Generally, a sunflower has long, thick, fuzzy and rough stem.
Draw a long vertical line from the bottom part of the flower. Now draw another vertical line symmetrical to the other.
Add two small stems on the sides of the main stem, one to the right side and the other to the left. We will draw two leaves along these small stems.
Step 6: Drawing the leaves
Sunflowers have large, broad and heart-shaped or ovate-shaped leaves. So now we’ll draw a heart shape leaf from the right side smaller stem facing to the right. Make sure to make the leaf broad in the middle and pointy towards the tip.
Draw another leaf similar to the first from the left side smaller stem, but make this one slightly facing downwards.
Now we’ll draw two more leaves in the bottom part of the sunflower on both sides, facing downwards.
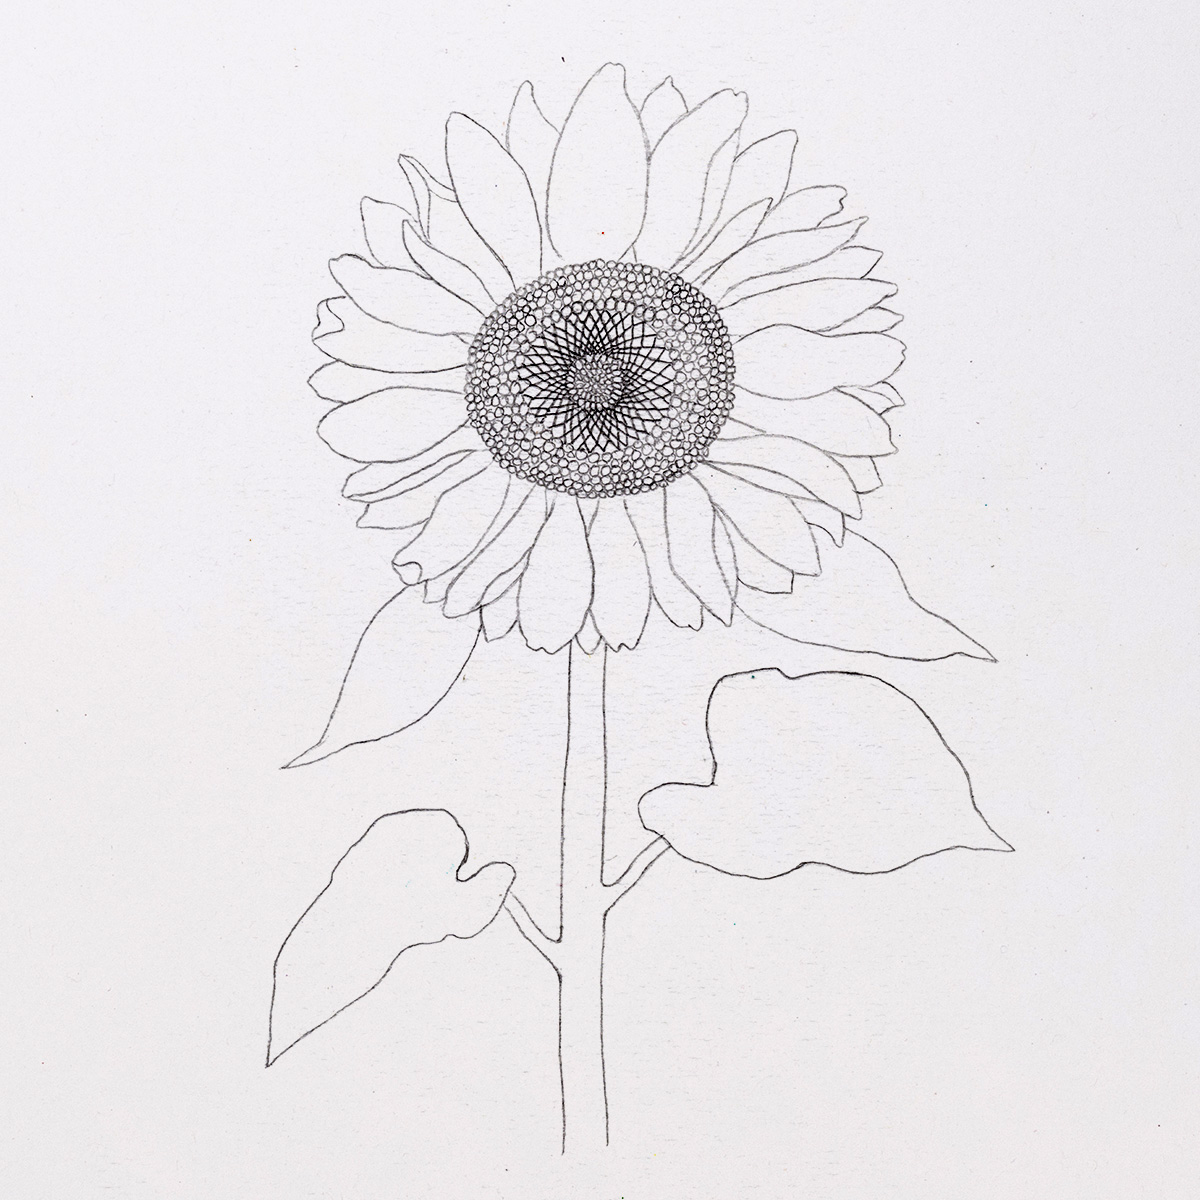
All these leaves should be thinner towards the tip, board in the middle and join the outlines at the bottom.
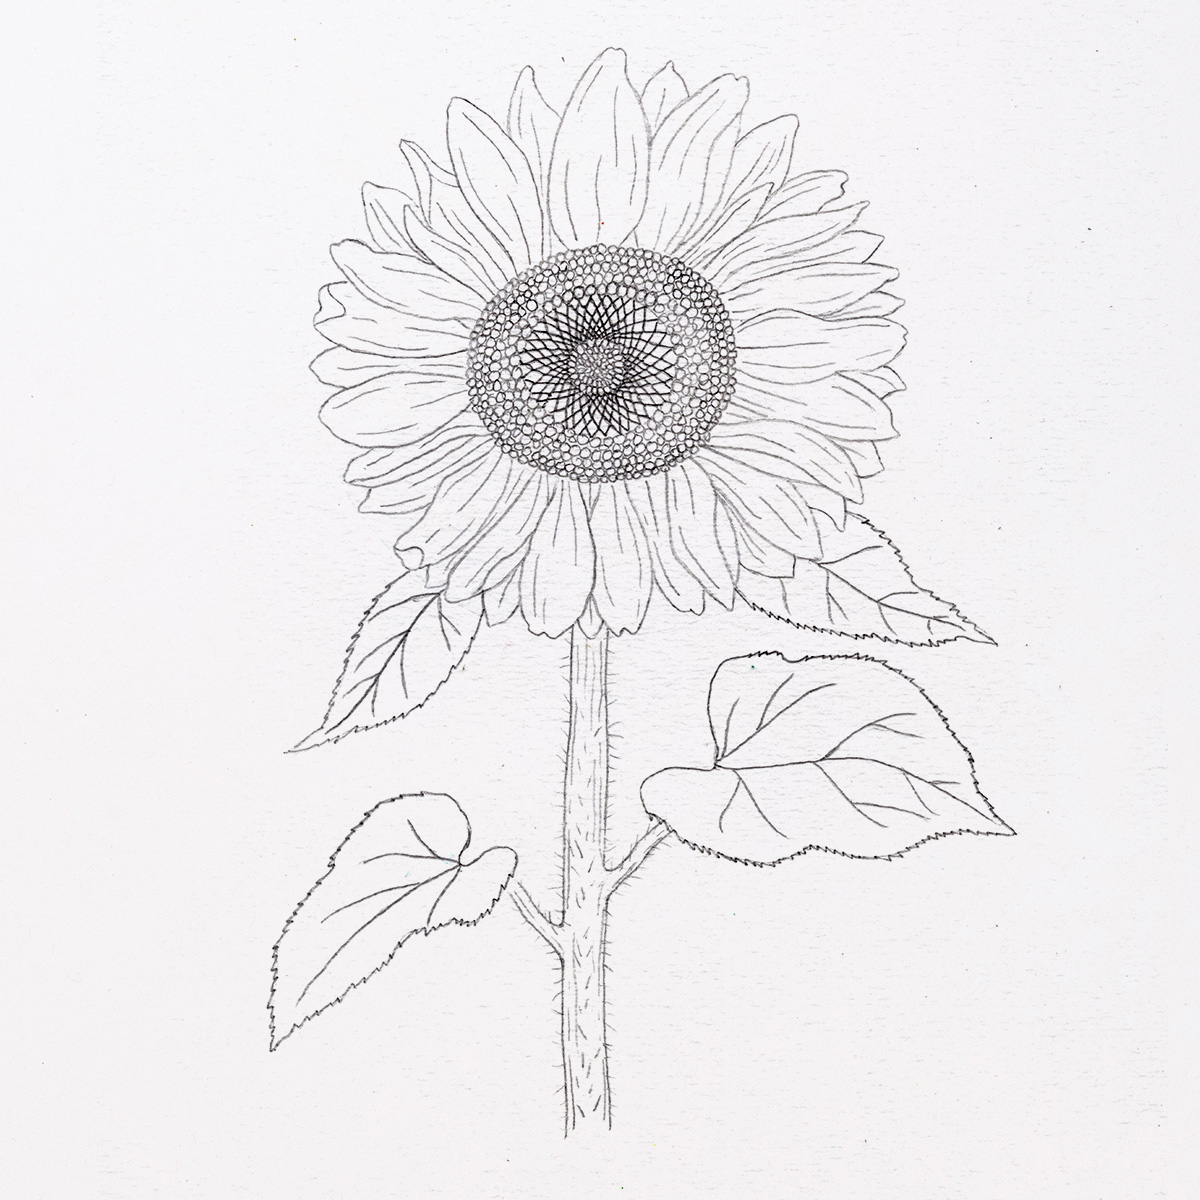
Step 7: Adding natural details
Now, we need to add some details to the flower petals, the head of the flower, the stem and the leaves to get a more natural look.
First, add some vein-like lines on each flower petal following its form. Next, add some small lines to the stems following the form of it and draw some fine hair-like lines all over the stalk to get a fuzzy look.
Now slightly erase the outlines of the leaves, then draw small spikes on the edges and add some veins to the leaves.
Step 8: Adding tonal values
Now we need to know the direction of the source of lights so that we can add some shadow to the flower to create a more realistic look. The location of the light source will determine where we should add shadows.
Let’s assume that the source of the light is on the upper left side of the flower, so we have to add shadows on the right side (opposite side of the light source) of our sunflower.
- We’ll start to add shadows from the centre part of the flower. If you see gaps between the smaller circles, fill them up and darken the outer parts.
- Next, darken the areas where the long petals connected with the head, along the vein-like lines and below the upper layer petals. Add more shades to the right side petals than the left.
- Finally, add some shadow to the leaves and to the right side of the stem by applying small strokes according to their shapes.
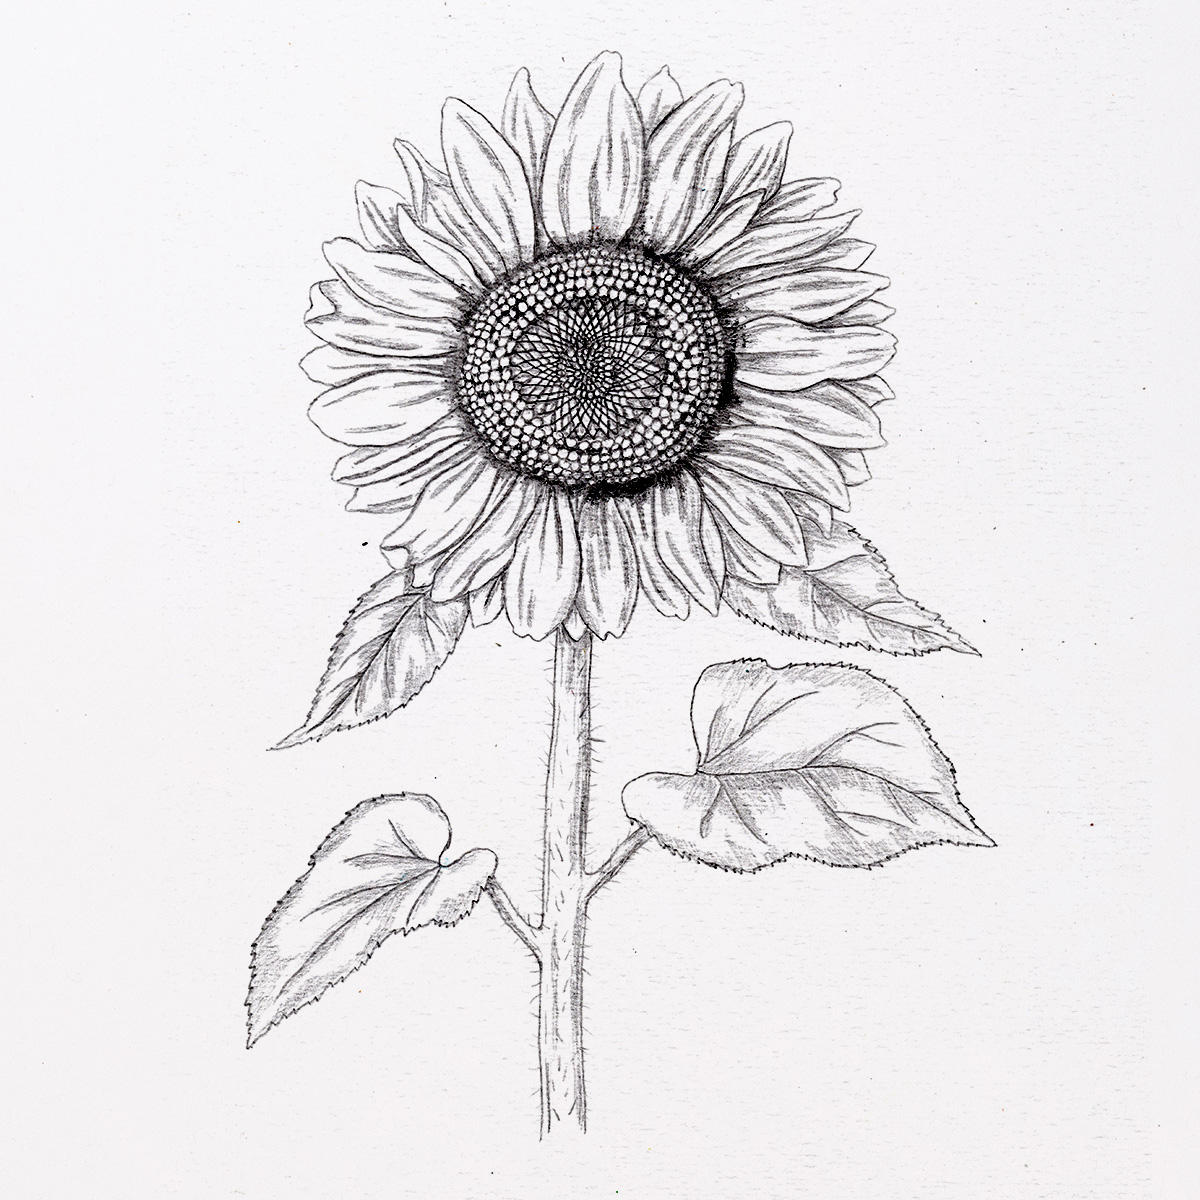
And this is how to draw a beautiful sunflower! I hope you enjoyed the sunflower drawing process and are happy with your final drawing!

Awesome
I love this drawing
Thanks
This was so helpful, thank you 🙏
So beautiful
This turned out to be a beautiful drawing I enjoyed it. Would want to add more steps confused on the shading,
I’ve used these instructions many times. thank you very much!!
I’m glad to hear that! 🙂
It was some what complicated but easy