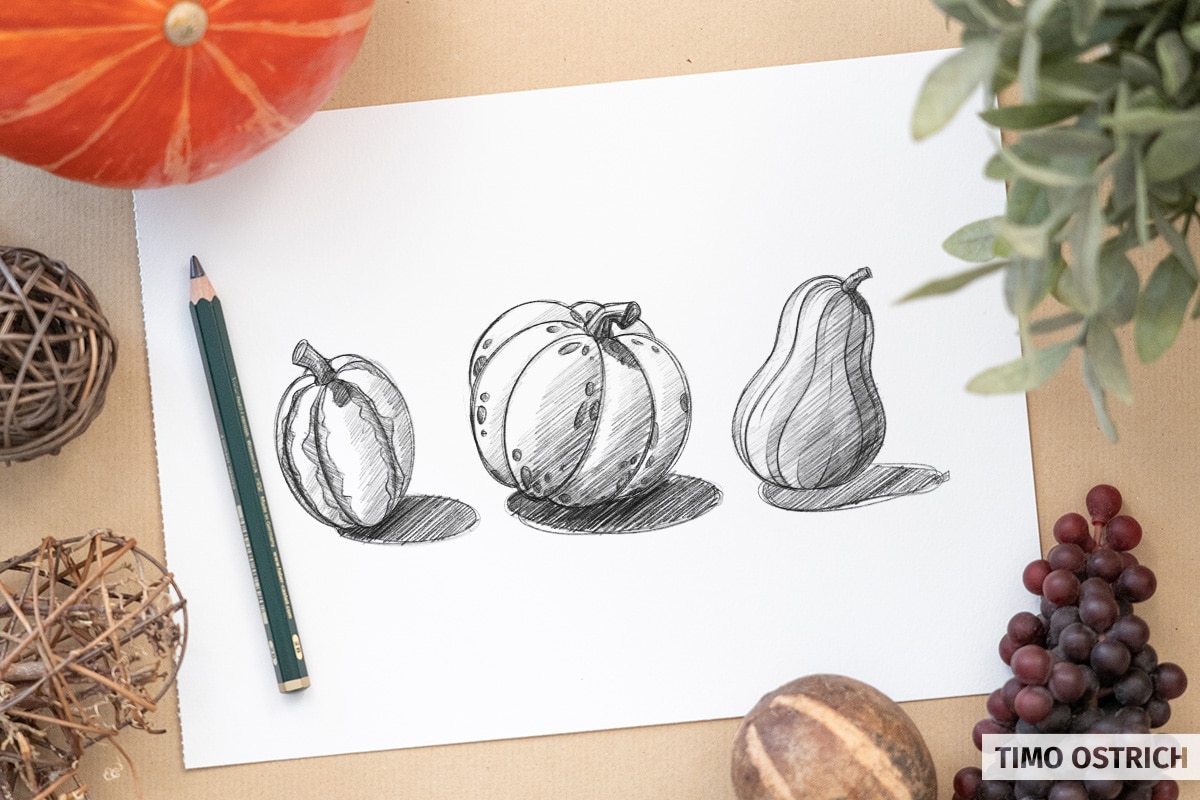
We want to draw a pumpkin! Today I’ll show you the best way to do it and draw many different pumpkins based on a simple technique. I’ll demonstrate all the drawing steps on three typical pumpkin variations.
Contents
Using basic oval shapes
As always, we start with a basic shape. We use a simple circle or an oval depending on the type of pumpkin. The exception is the butternut pumpkin, for which you draw two circles.
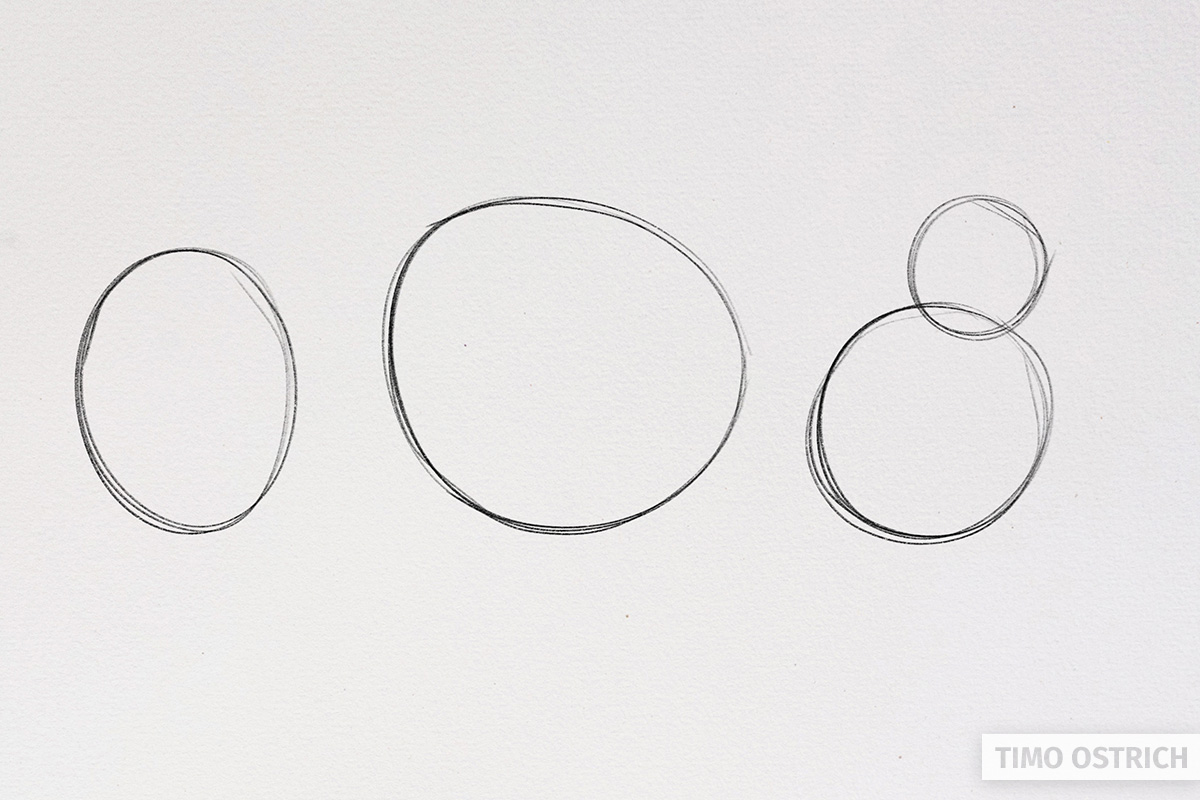
Tip: Pumpkins rarely have a perfect, round shape. Often they are flatter on the bottom or have natural bumps on the surface.
Draw the pumpkin skin
Next, you define the position of the stalk. Here, too, a small circle is enough.

Starting from the stalk, you now define the individual parts of the pumpkin skin. As a rule, oval lines are good enough for this. Towards the edge, the areas appear somewhat narrower – so you set the lines a little closer together.

- In this step, you may also feel free to overdraw your basic shape, it is only used for rough shaping.
- You can already erase superfluous lines of your basic shapes in this step.
Now it’s time to complete the stalk. This can be straight or slightly bent. I like to draw another small oval for this purpose, which I then connect to the existing base of the stalk.
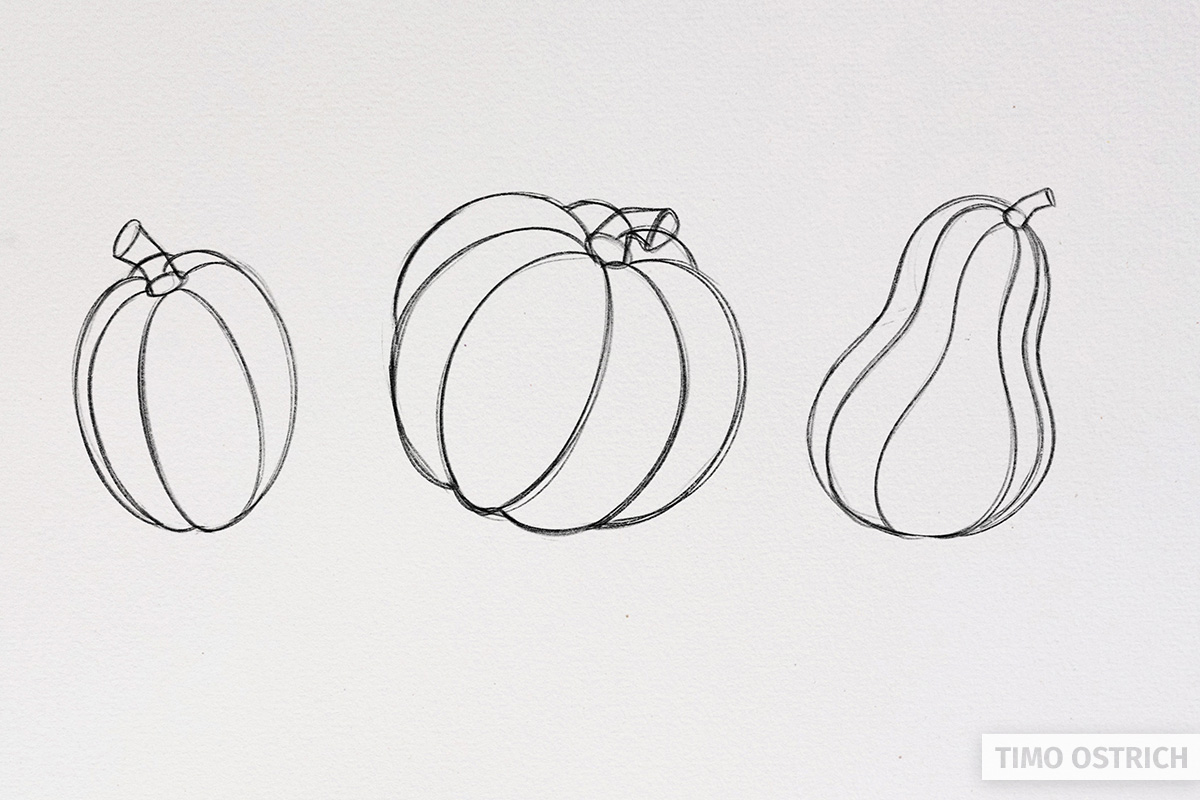
So our three examples already look like real pumpkins.
Natural details
Pumpkins are a natural product and accordingly do not have a smooth, even surface. Instead, there are bumps, spots and structures. Exactly these details provide a natural and realistic-looking drawing.

When drawing such details, it’s worth taking a closer look at different pumpkins and being aware of which details are the most distinctive. We then transfer these details to our drawings.
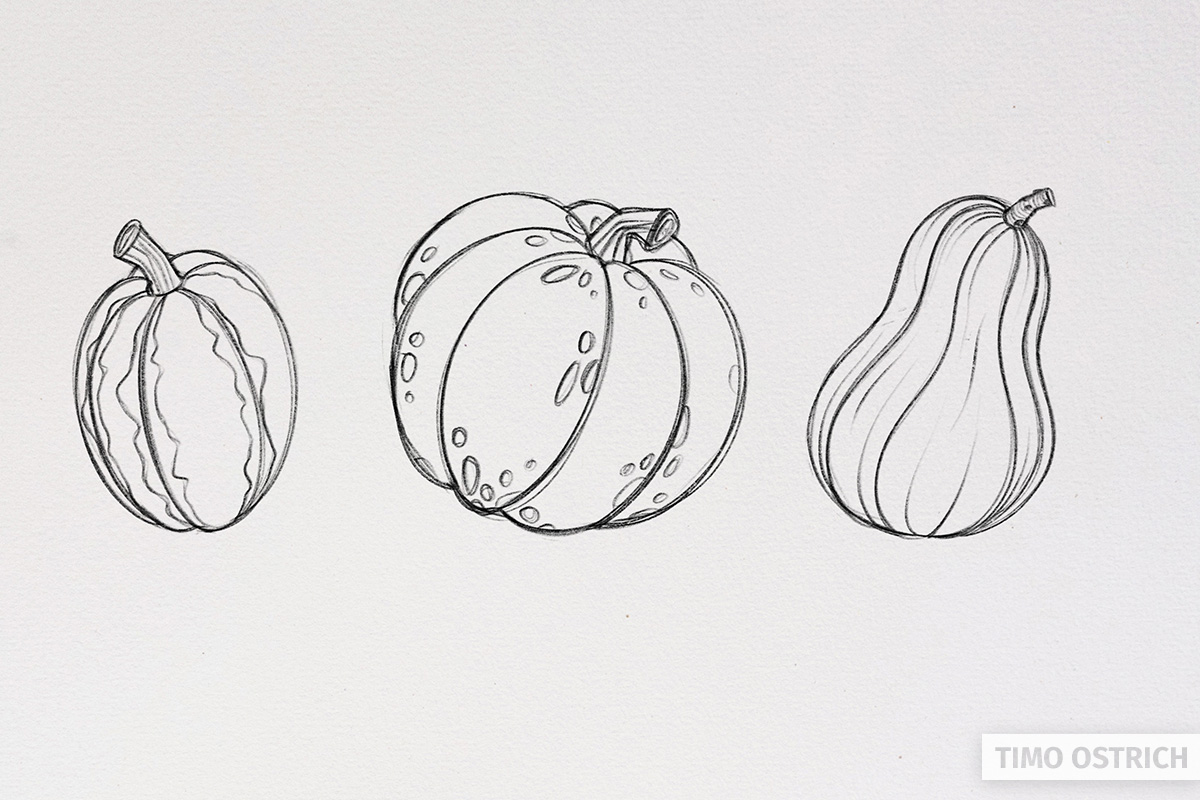
- The first pumpkin gets a remarkable texture in the different areas of the skin.
- On the second pumpkin, draw some dots and spots.
- The butternut pumpkin is often very smooth – here we just add a few extra lines in the direction of the skin.
With the new details, our pumpkins not only look more natural, but they get much more character.
Add tone values
Since we don’t use colors in our drawing we now add different tonal values.

- On the one hand, you define different color tones with different hatchings. Especially the details should stand out from the rest of the pumpkin.
- On the other hand, you are already using the hatching to shade your pumpkin. Think about from where the light falls on your object.
For the examples, I only use simple parallel hatching. How to hatch correctly and what other possibilities you have to give an object like the pumpkin more plasticity, you will learn in my corresponding article.
Additional shadows
Finally, some additional shadows follow. These include further self-shading by the stalk and, most importantly, a strong drop shadow under the pumpkins (otherwise it looks like our pumpkins are floating in the air).

And we’ve already finished drawing three different pumpkins! Now you know how to draw a pumpkin step by step. This calls for a pot of pumpkin soup, right?

Perfect! Thanks for sharing.
Thank you so much!
thank you for helping me draw a pumpkin its for my school project and all my friends bully me for trying so hard but I don’t care. I might be able to draw better now thank you