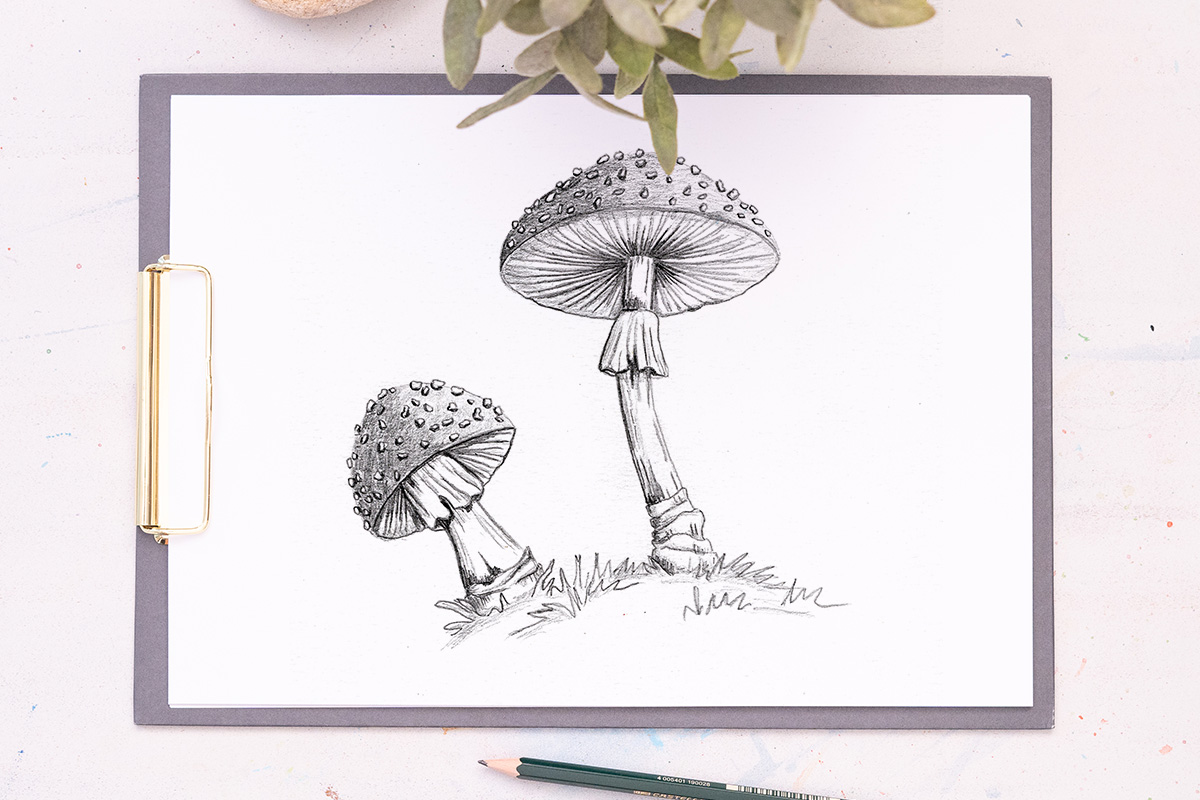
Would you like to draw a realistic mushroom today? Mushrooms are fun and comparatively easy to draw. In today’s drawing tutorial, I will show you some very easy steps to draw a realistic mushroom. So grab your art supplies and get ready to draw! We just need a blank paper sheet, a pencil and an eraser for this drawing.
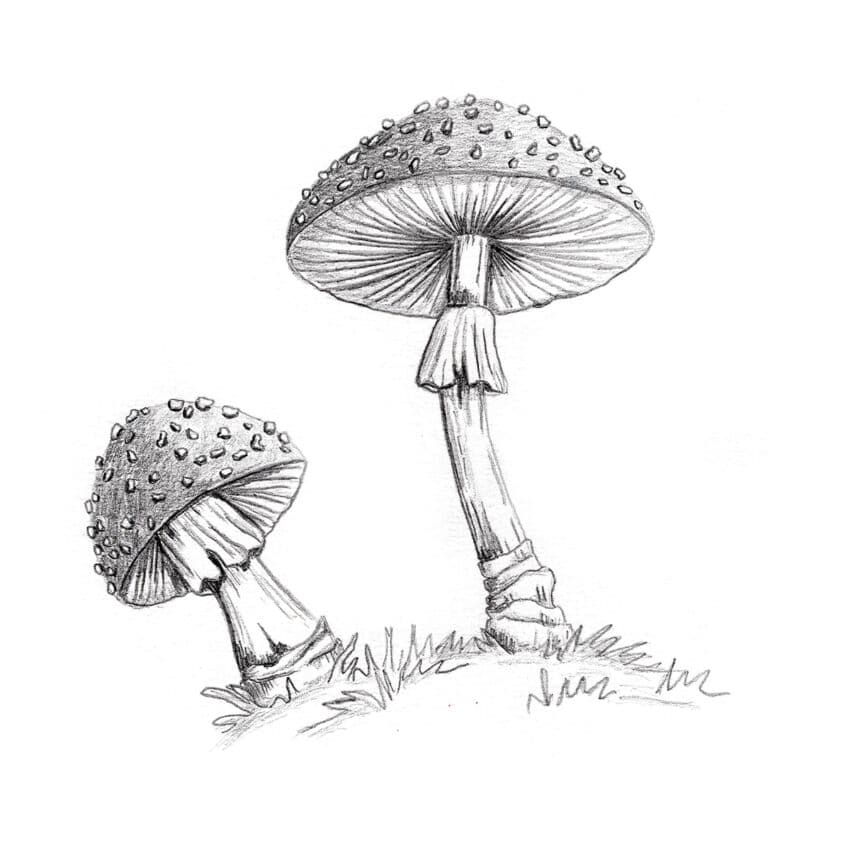
Mushrooms exist in many varieties with different shapes, sizes, and colors. Today, we’re going to draw some fly agaric mushrooms.
Contents
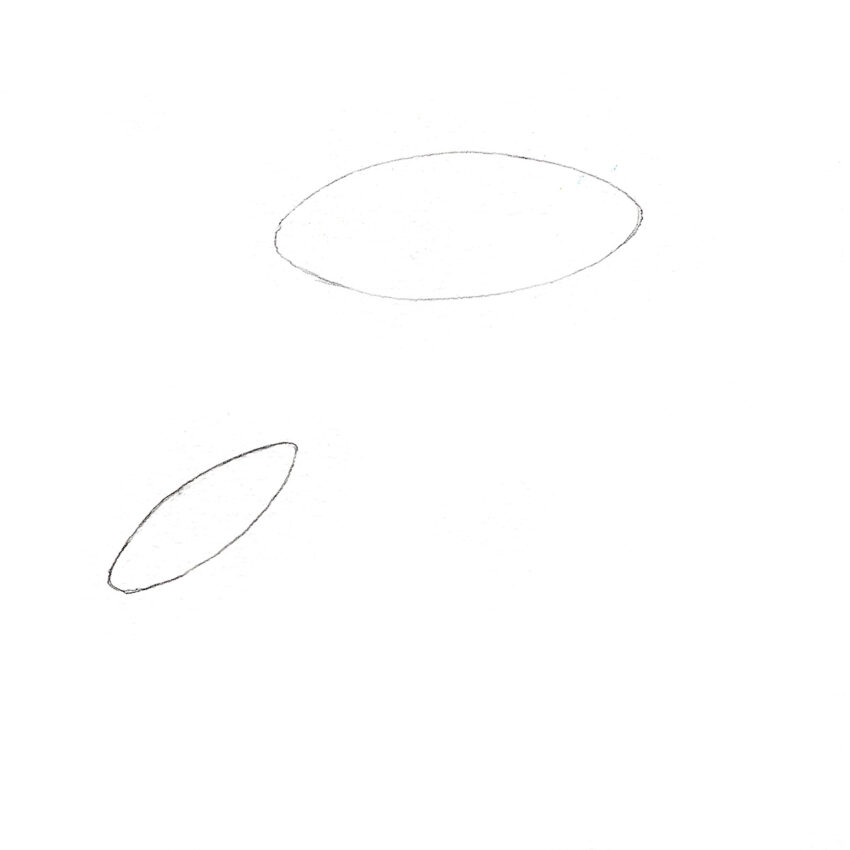
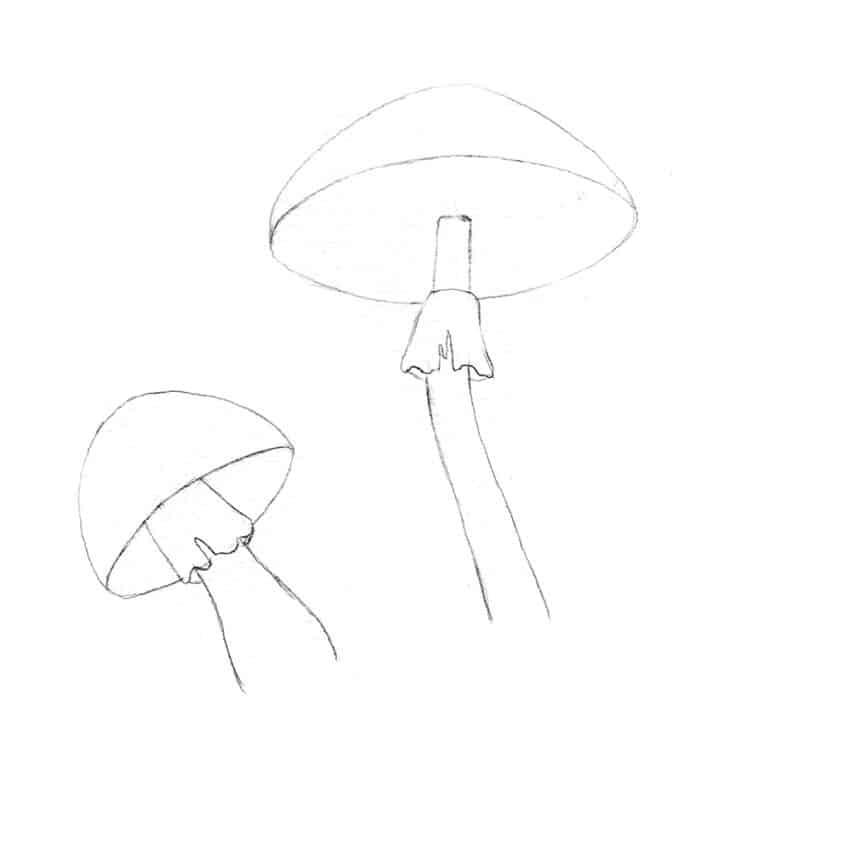
Step 1: Starting with two ovals
We will start the drawing by creating some guidelines first so that it will be easy for us to draw the mushrooms.
Generally, the cap of a fly agaric mushroom is parasol-shaped. So we’ll start the mushrooms by drawing an oval in the middle of the paper.
Now draw another oval to the left-hand side. The second oval will be slightly smaller in size than the first one and slightly tilted to the left side.
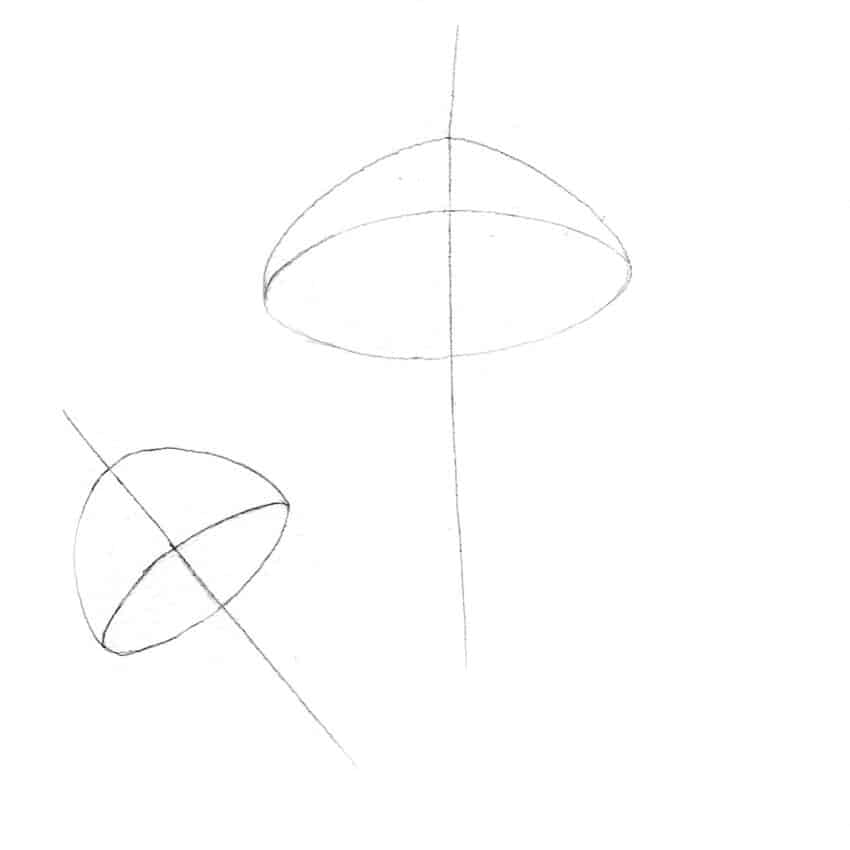
Step 2: Drawing curved lines
Draw a long vertical line through the middle of the first oval. Next, draw a curved line above the oval. The highest point of the curved line should be at the middle part, where it crosses the vertical line, and connect the line with both sides of the oval.
Now we will get our parasol-shaped mushroom head. Next, draw a vertical line through the middle of the smaller oval and make a curved line following the same steps.
Just make sure to draw the line arc-shaped. Make these lines as light as possible, so that we can easily erase some of these guidelines later.
Step 3: Adding the stalks
A fly agaric mushroom has a white brittle stem with shaggy rings around them, slightly below the cap. It has a bulbous volva at the base from which the mushroom emerges.
First, draw a small horizontal line in the middle of the first oval crossing the vertical line, and then draw two more vertical lines from both sides of the small horizontal line symmetrical to each other. Now bend both the lines slightly towards the left-hand side and make the stalk a little longer.
Next, we’ll draw the stem of our second mushroom. Draw a vertical line from the upper line of the oval. Now draw another vertical line symmetrical to the other. Make sure to draw the stalks from the middle of the mushrooms.
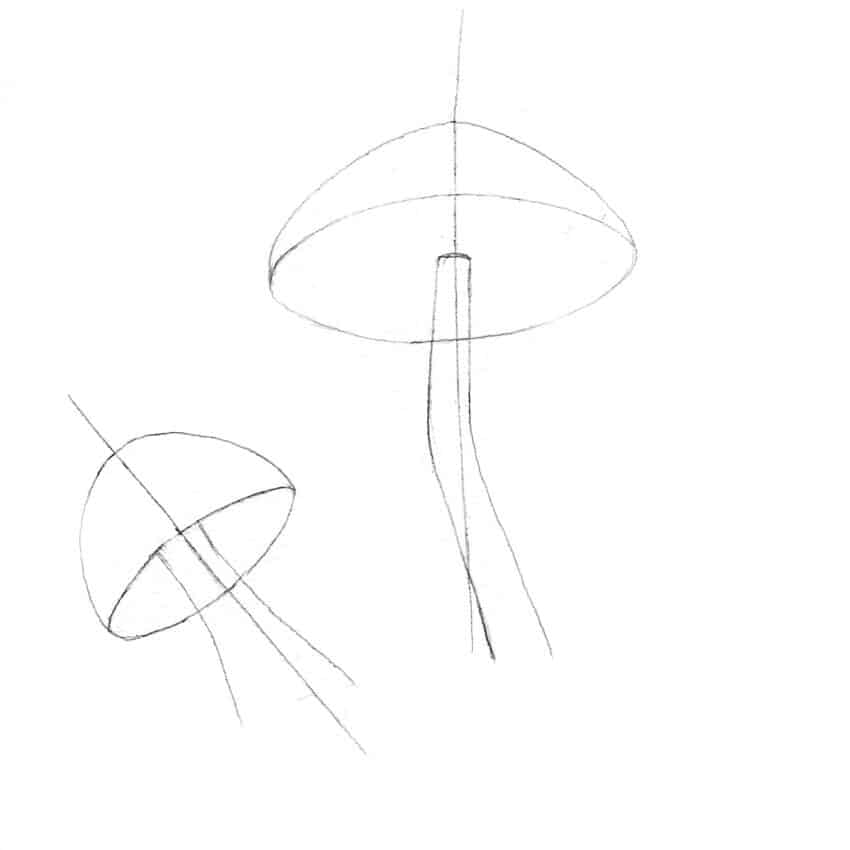
The stems should be thicker towards the bottom and thinner towards the upper part.
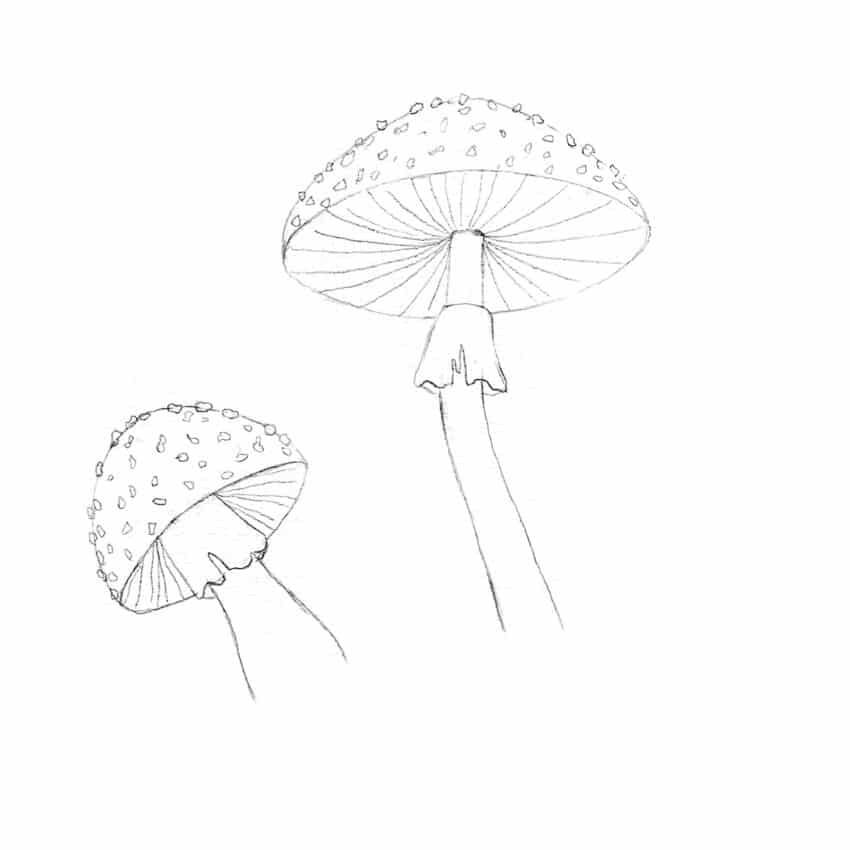
Step 4: Drawing the rings
A fly agaric mushroom has a ring around its stalk, slightly below the cap. This ring generally looks like a curtain hanging around the stalk.
First, we’ll add a ring to the stalk of the larger mushroom. Draw two curved lines on both sides of the stalk, from the bottom line of the oval to downwards. Now join these lines with a small curved line at the upper part and with a wavy line at the bottom.
Next, add a ring to the stalk of the smaller mushroom by drawing two curved lines on both sides of the stalk, from the upper line of the oval to downwards, and connect them with a wavy line.
Now you can erase any visible guidelines that we have made before.
Step 5: Adding gills and spots to the cap
Mushrooms tend to have various spots on its cap and gills under the cap. Mushroom gills are thin, papery structures hanging vertically under their cap.
First, add some spots to the top of the mushroom cap. These spots can be round, oval or some other irregular shapes.
Now, we will draw the gills of the larger mushroom. Draw some curved lines from the centre of the oval towards the outer line of the oval in a circular pattern. Next, draw the gills to the smaller ones by drawing some curved lines from the stem towards the outer line of the oval.
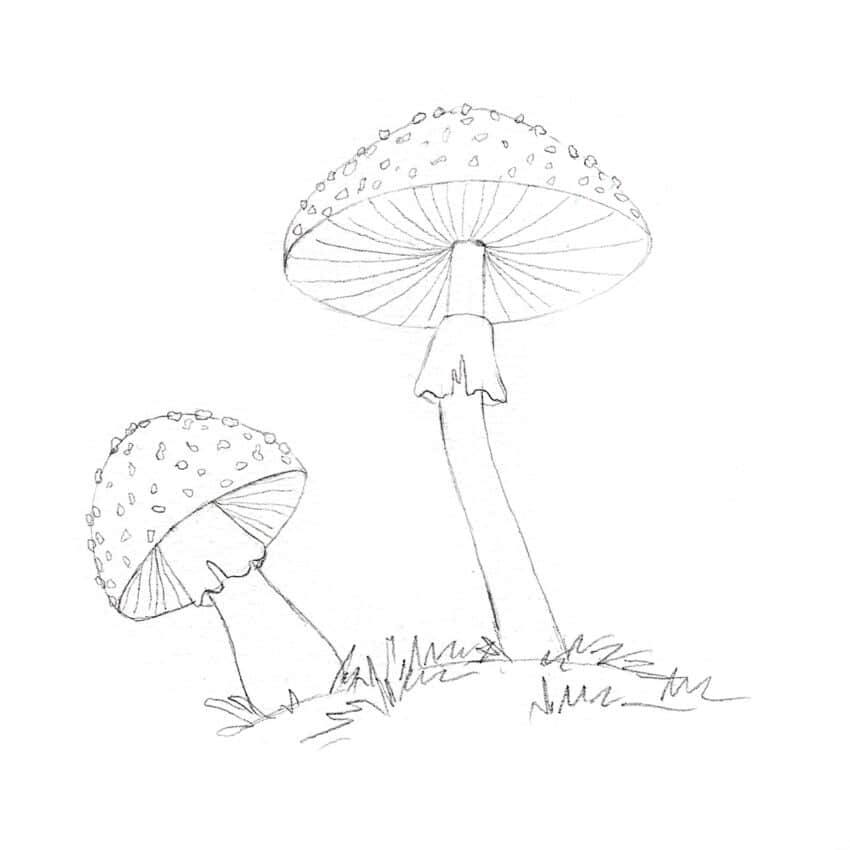
Step 6: Drawing some grass
To give these mushrooms a more realistic look, we have to make a natural-looking base. For that, we’ll draw some grass along the bottom of the mushrooms to create the base.
Step 7: Detailing the mushrooms
Now it’s time to add some details to the mushrooms to make them a little more realistic. Add some steps like structures to the bottom part of the stalks. It will help to create the texture of the stalks.
Next, draw some small lines on the sides of the stalks following the form of it and add some more curved lines to both ovals. Add some curved lines from the bottom of the rings upwards.
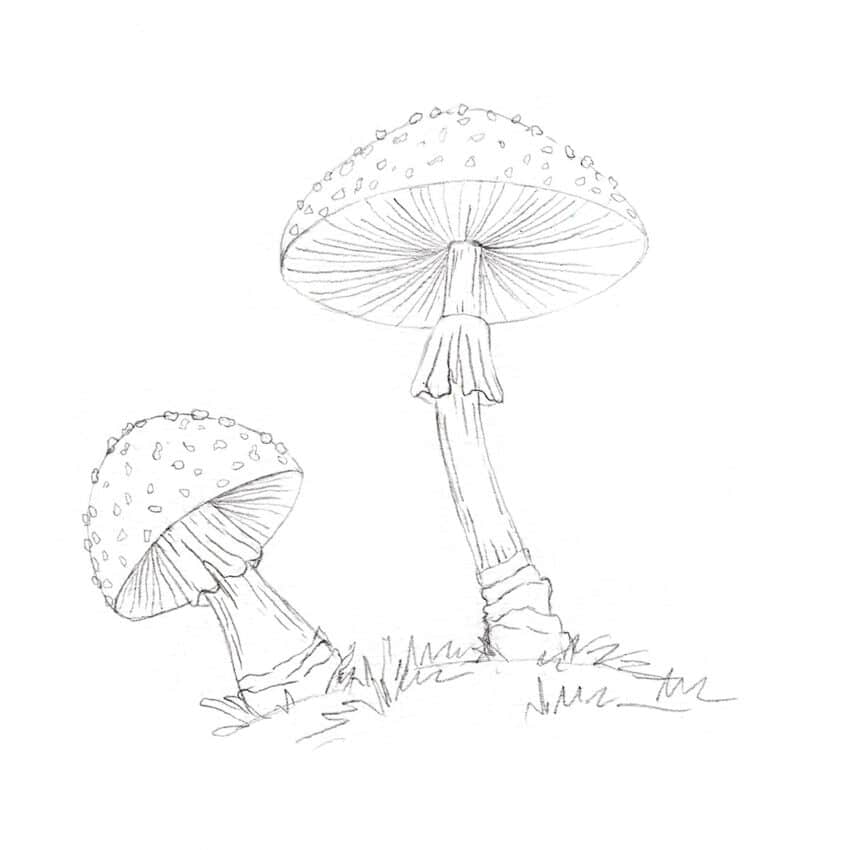
Step 8: Adding value
Now we’ll add some shadows to the mushrooms to make them more realistic and for that, we need to know from which direction the lights are coming. It will determine where we should add shadows.
Let’s assume that the lights are coming from the right side of the mushrooms, so we have to add shadows on the left side (opposite side of the light source) of the mushrooms.
We’ll start to add shadows from the upper part of the mushrooms. First, darken the upper part of the mushroom cap leaving the spots, and then darken the insides of the cap along the gills lines.
Now add shadows to the curtain-like ring and left sides and bottom of the stalks by applying small strokes according to their shapes. Make sure to add more shading to the left side of the mushrooms than the right.
And this is how to draw a mushroom! I hope you enjoyed the drawing process and you are happy with your final result.

this is so cool its amazing!