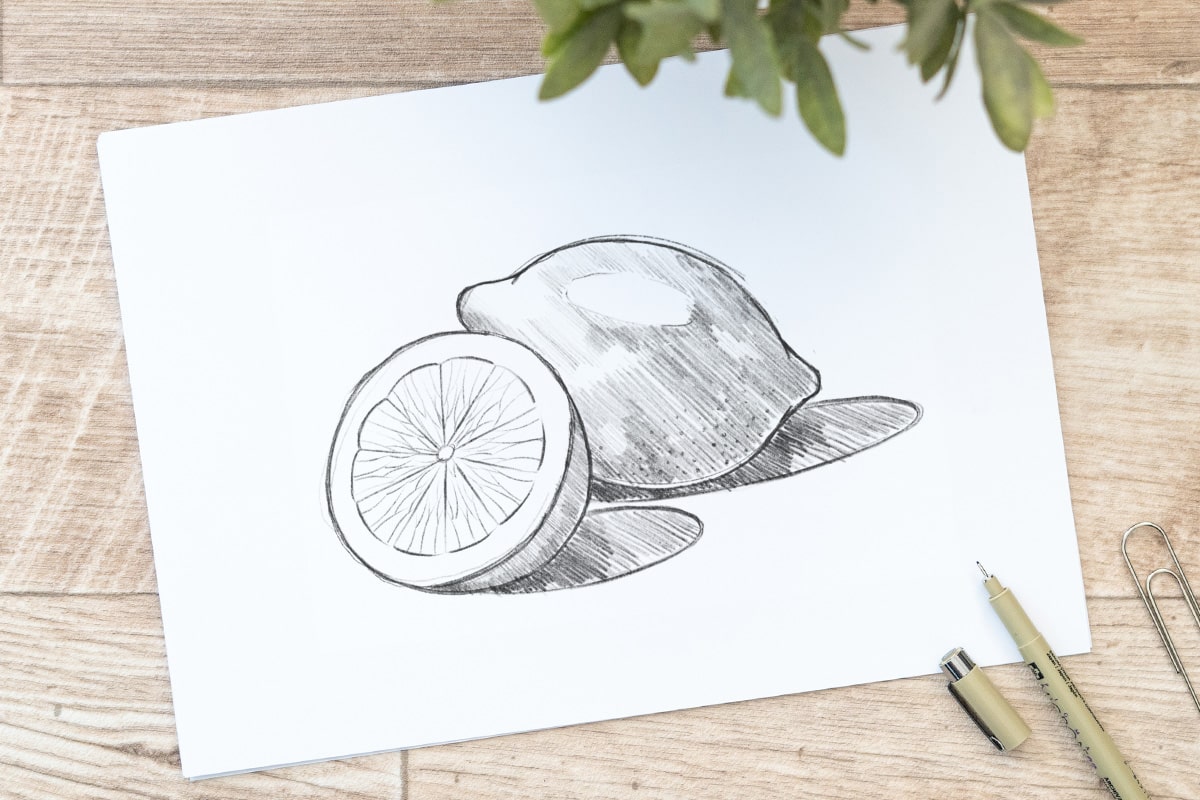
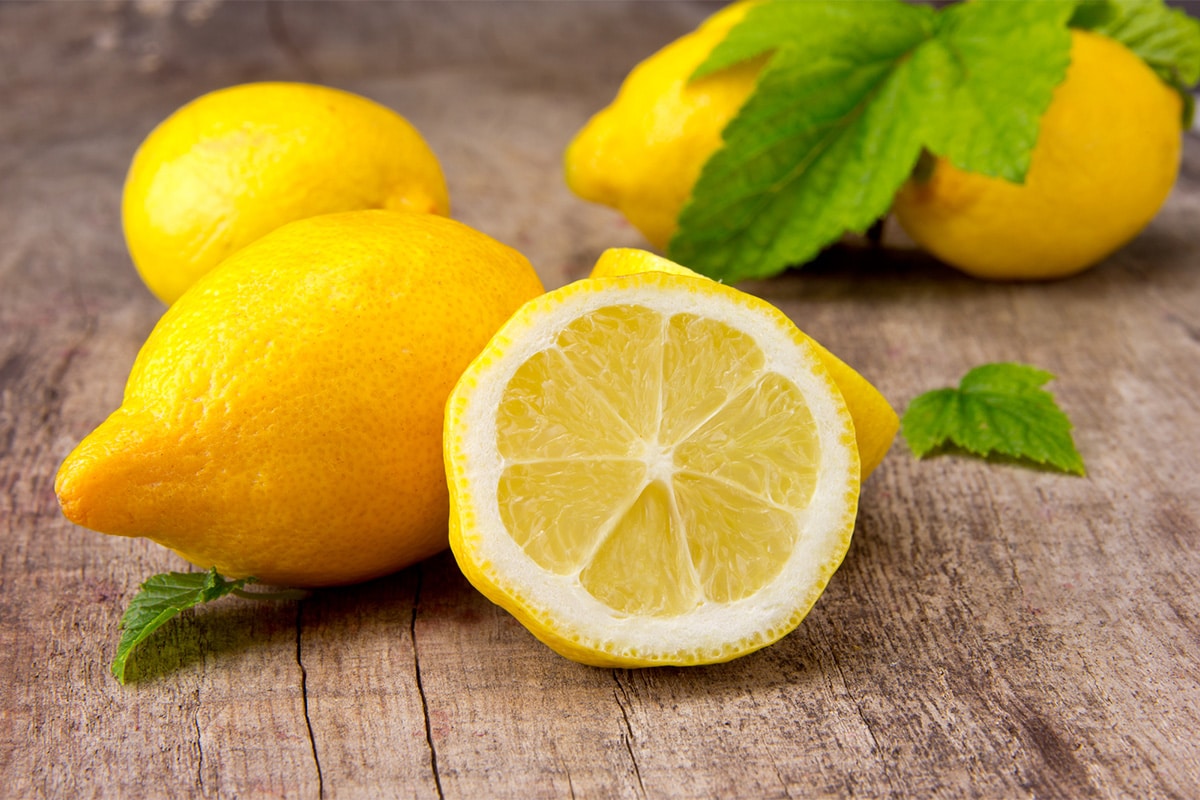
Let’s draw a lemon! Today I’ll show you a bulletproof way to draw one and a half lemon step by step. The only tools you will need are a simple pencil and a rubber.
In fact, this tutorial is the perfect foundation to draw any kind of lemons or even other fruits with similar shapes!
Contents
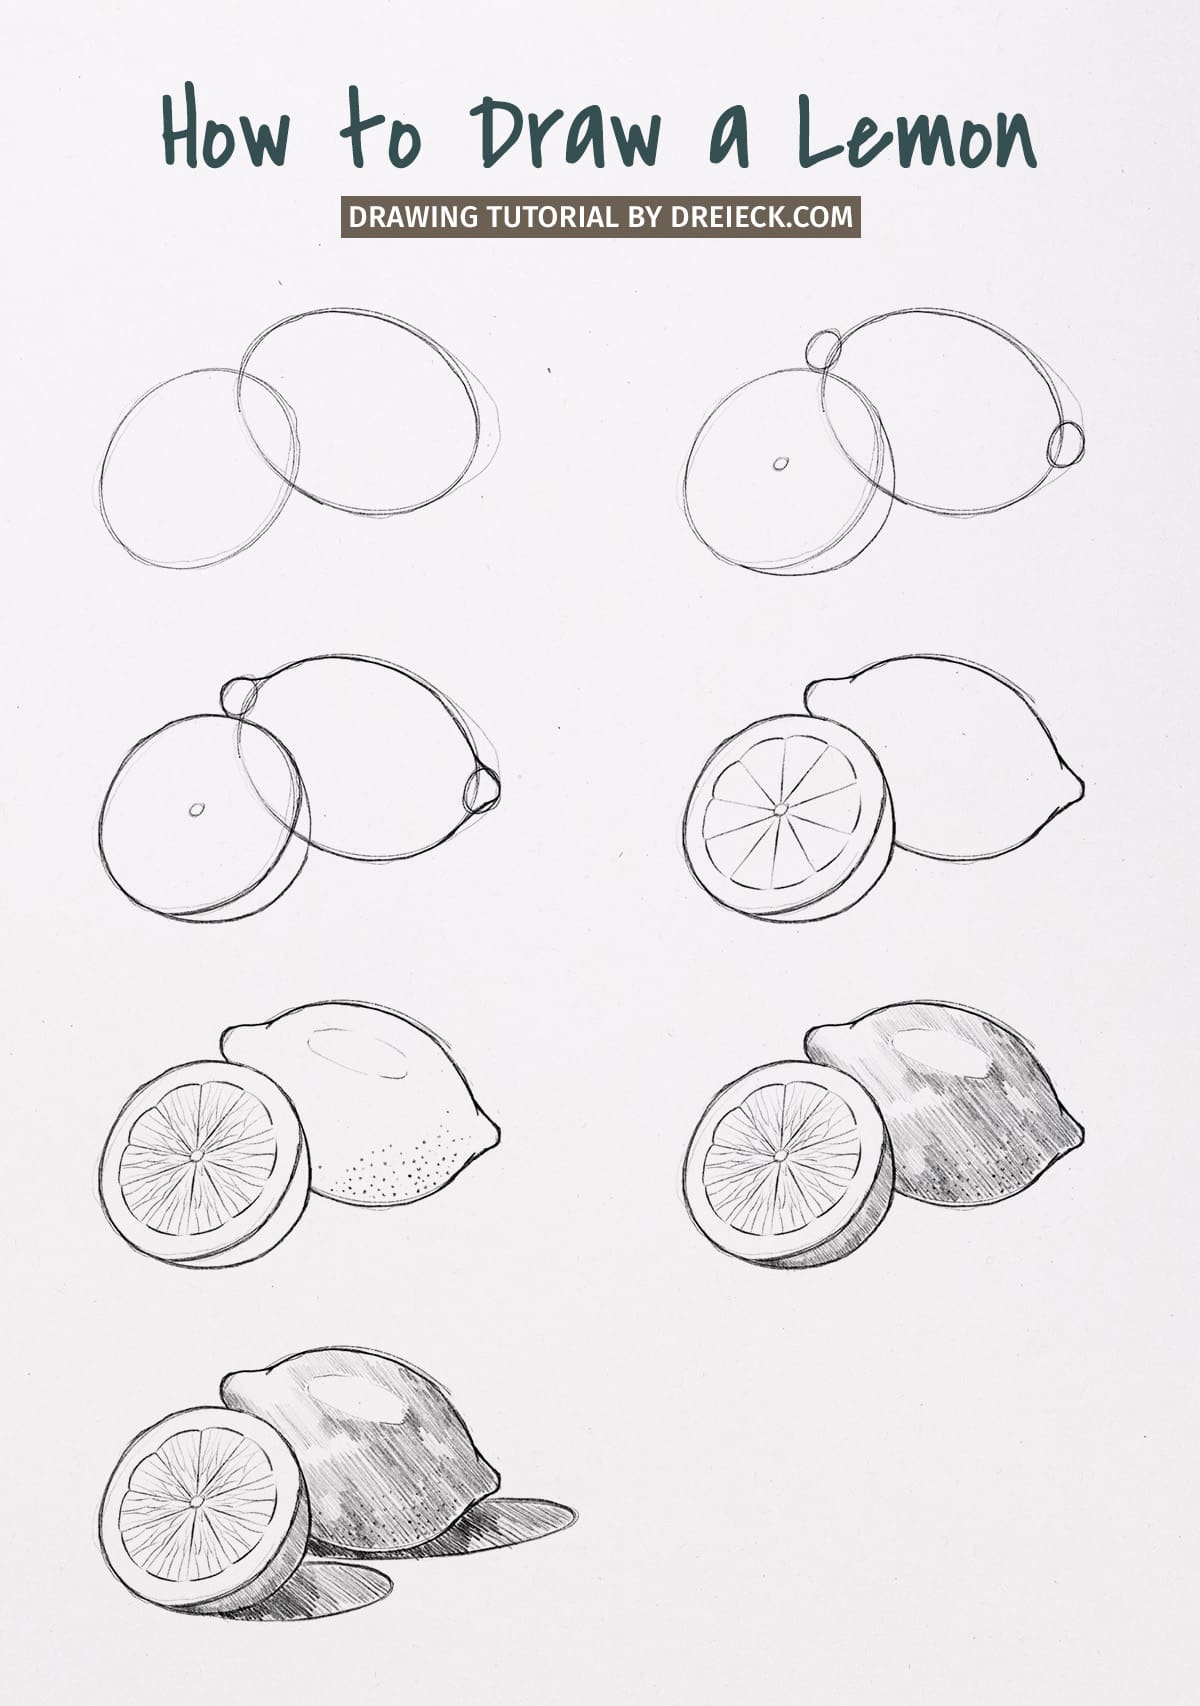
Using basic oval shapes
Alright, as the first step we start with a basic shape. We use a simple circle or an oval depending on the whole lemon shape and slice. On the surface of the lemon peel, you just need to add some texture later on, but on the cut side you need to draw some lines and circles.
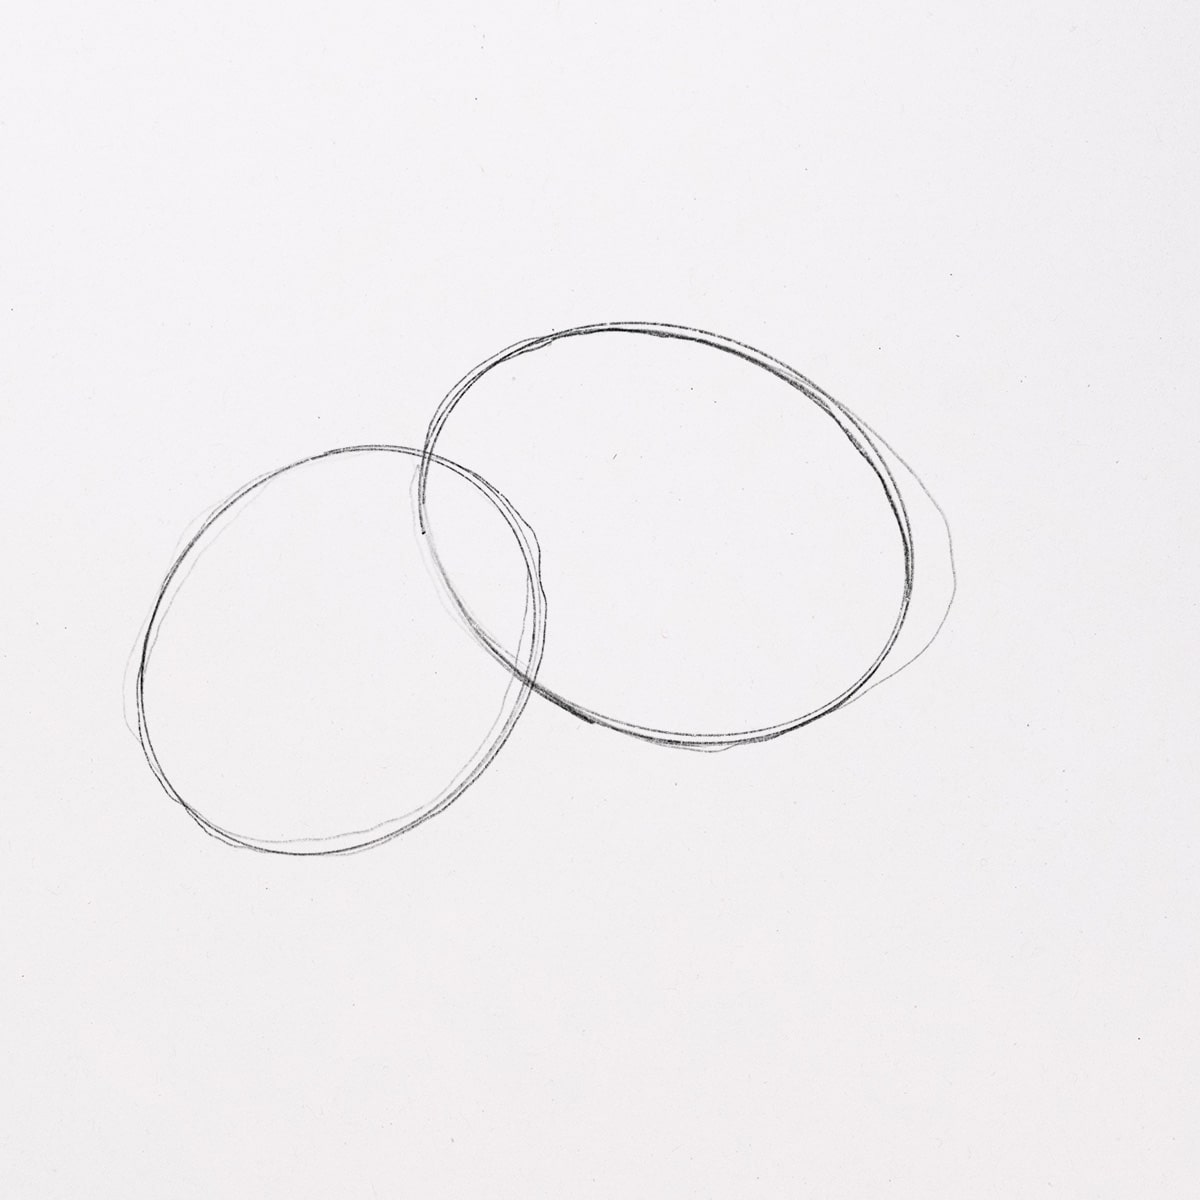
Tip: Lemons have an imperfectly round shape. Its shape is more of an oval with a bulge at each end of the lemon. So it is necessary to add a little bulge shape when drawing the lemon shape.
Drawing the lemon skin
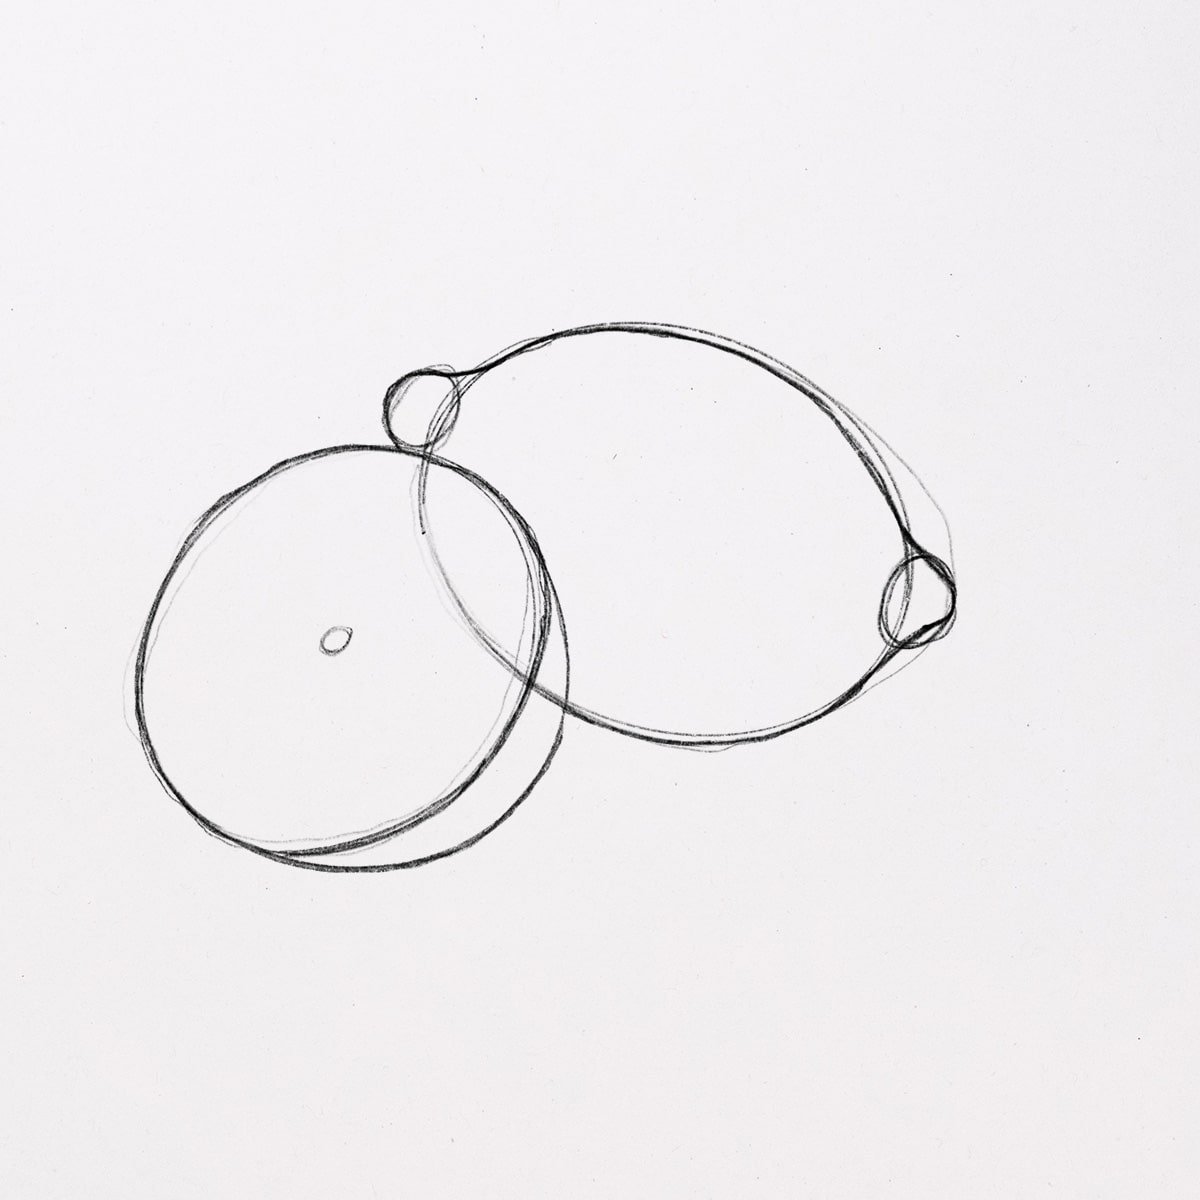
Next, you have to determine the position of the bulge on the tip of the lemon. Here, you just make two small circles at each end.

By combining the bumps and ovals you can now draw the entire outer shape of the lemon. For the lemon wedge, you just need to draw a semi-circle by making a small circle in the middle.
- At this stage, you may also feel free to draw your basic shapes, they are used for rough shaping only.
- You can already erase superfluous lines of your basic shapes at this step.
Now it’s time to finish the lemon slices. You can make slightly crooked lines as well as straight lines, following the small circle in the middle. On the edges, I tried to combine some of the lines around the small circle to form some kind of a pizza slice.
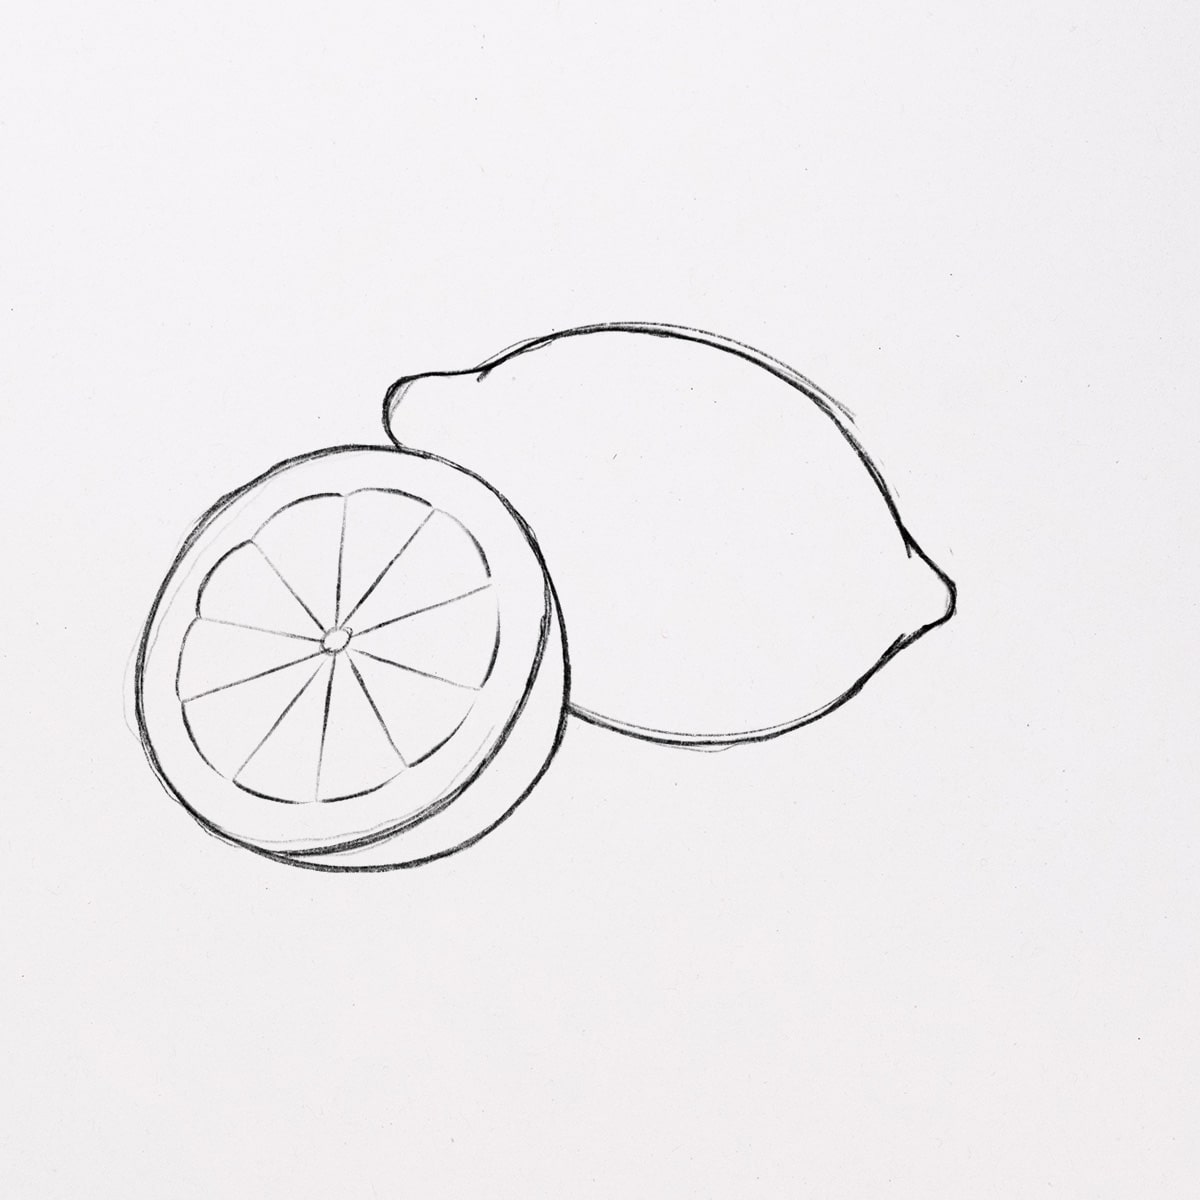
So, our drawing already looks like a lovely fresh lemon, doesn’t it?
Natural details
Lemon is a fruit that has a clean and shiny surface. At the end of the fruit, some lumps make limes have their characteristics. The shiny shape of the lemon peel makes the lemon look more fresh and more beautiful.
When drawing such details, you should pay attention to the part of the lemon that should be highlighted, so that the shiny character of the lemon peel can be more described.
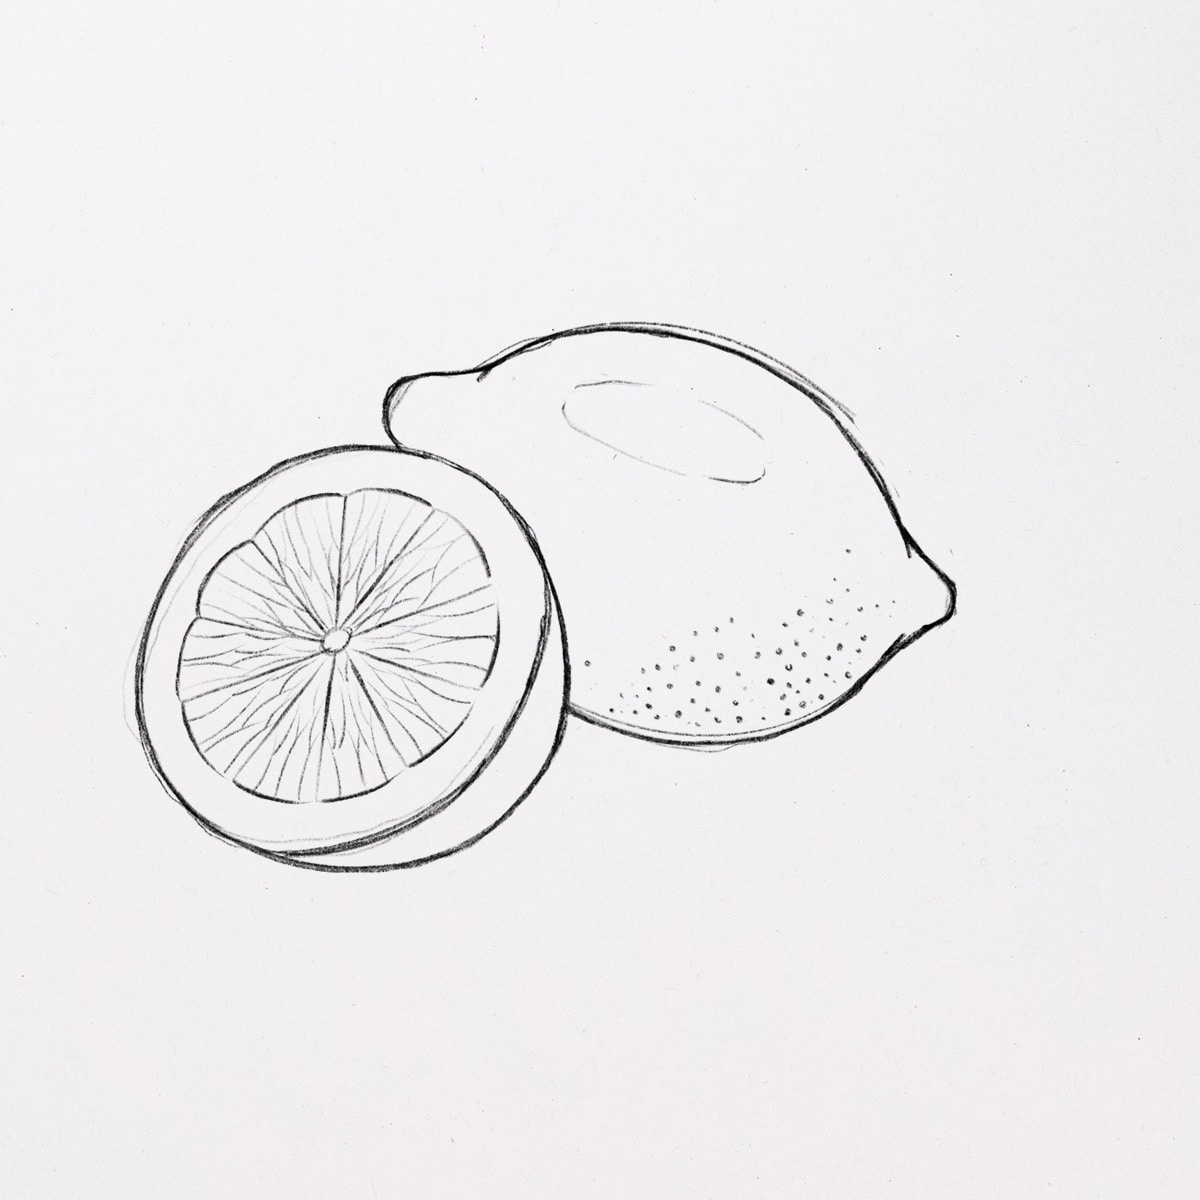
- The first lemon gets a nice glossy texture on the surface area. Add some points to draw the texture of the surface.
- On the second lemon, draw a line across and combine the lines so that they form like slices of a pizza. Next, draw multiple thin lines on the flesh of the fruit.
With these details, our lemon will not only look more natural, but also more realistic.
Adding tone values
Because we are using monochrome colors in our drawing, let’s add different tonal values.
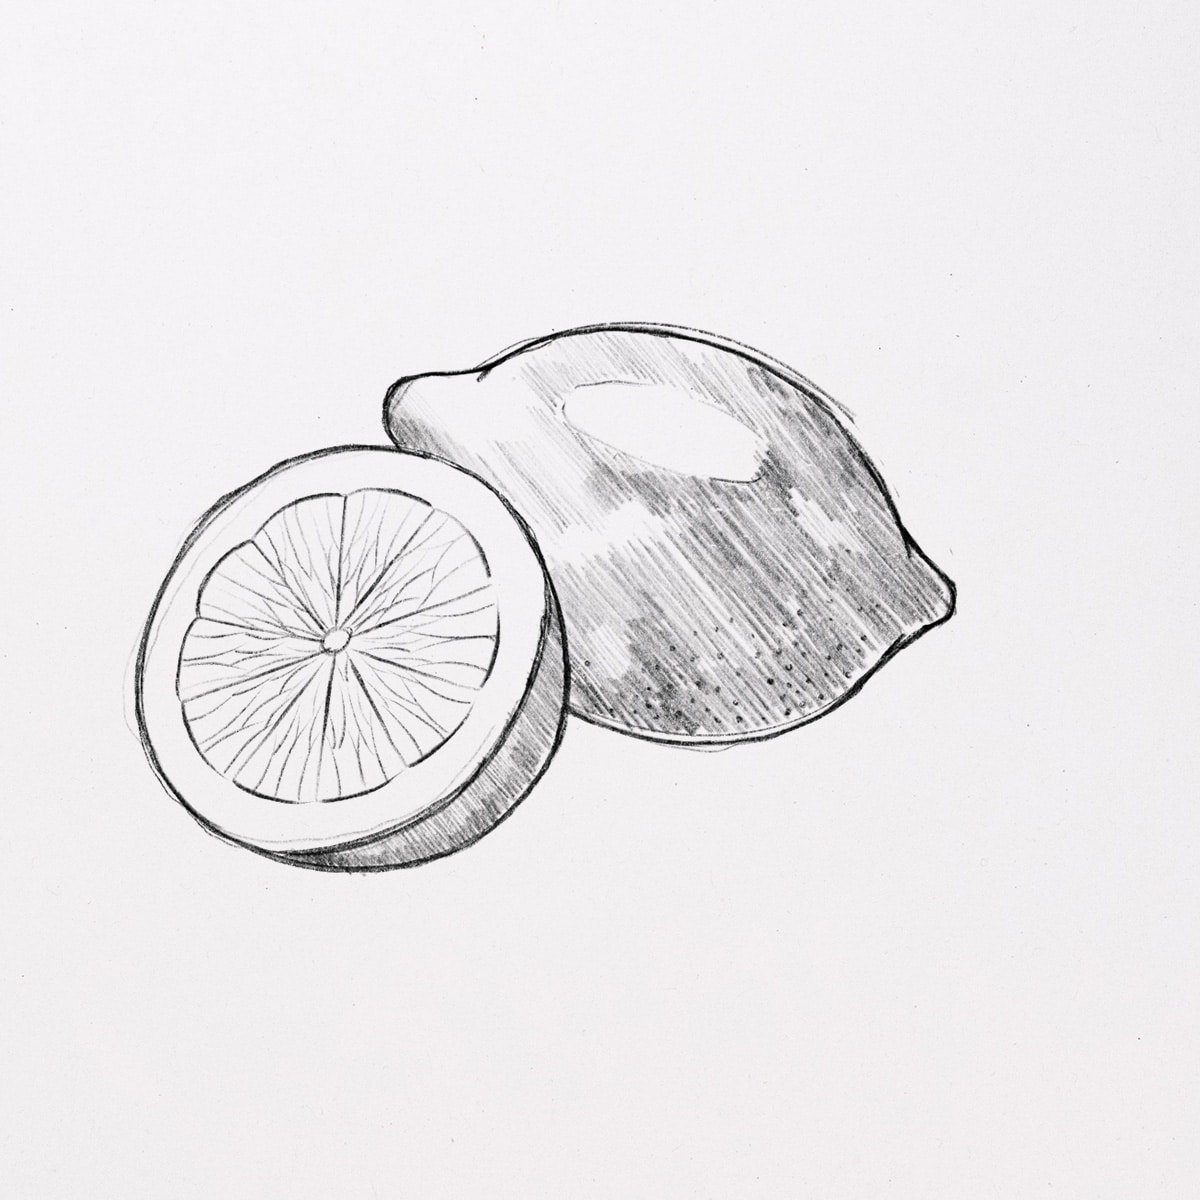
- One thing that is important, is to define different color tones with different hatches. Especially the details should stand out on the glossy surface area of the skin.
- On the other hand, you’ve used hatching to shade your lemons. Think about where the light falls on your object and also add a few dots on the lemon peel to make it look textured and natural
I just used a simple cross hatch and also lightly grease the lemon peel to make it look more natural.
Additional shadows
In the last step, you have to draw a stroke under the lemon to create a shadow effect, so the fruit doesn’t look like it’s floating.

With these final shadows, we’re done drawing a lemon! Now you know how to draw a lemon and some lemon slices step by step. It looks like it’s time for some refreshing lemon juice now. 🙂
Best drawing ever! It is soooo easy method
its pritty bad and not good
wrong
I don’t know if Gorge is necessarily wrong; it is definitely not that good of a drawing. I personally do not like the shadows, and I think it looks best at step number 5.
Thats so rude ! Learn to spell Pretty before your bring others down stupid
Very well
i loved it i was drawing a lemon for my teacher.
Nice
So easy
fun but hard I really like it 🙂
It was really good and helpful. Also I like the shades it’s nice.
Glad to hear that! 🙂
i did it with stripes (blue) really nice
it is so fun and sour and it is easy and like shading!!!!!!!!!!!!!!!