Drawing leaves is always fun, has a calming effect and embellishes any drawing. Whether individually, in wreaths or on trees – leaves bring a natural look and character to the paper.
Now it’s time to learn how to draw leaves. Abstract, detailed and in different shapes. To the pencils, ready, go!
Contents
Basic shapes of leaves
Before we get into the different techniques, let’s look at how we actually recognize the different leaves as such. This will help enormously in putting the relevant factors on the paper later.
The most important characteristic of a leaf is its outer shape.
You would recognize many leaves from the outline alone (regardless of whether you can name the appropriate tree species).
This means for all our drawings: With the right outline, we have already accomplished the most important part!
Take a look at the following photos. There you can see how different the individual leaf shapes are:


Apart from the shape, there are other important characteristics. These are mainly the texture and, of course, the colorfulness.
The texture of each leaf vein is also very individual and different for each leaf. By drawing the texture, you add character to your leaf and make it even clearer what species it is.
Last but not least, the colorfulness gives information about the tree species and especially about the season. Leaves therefore offer great potential – also for colorful works of art.
So if you want to know how to draw a particular leaf, take the time to look at it in detail!
Transfer the typical characteristics to your drawing on your own rather than googling for other drawn images!
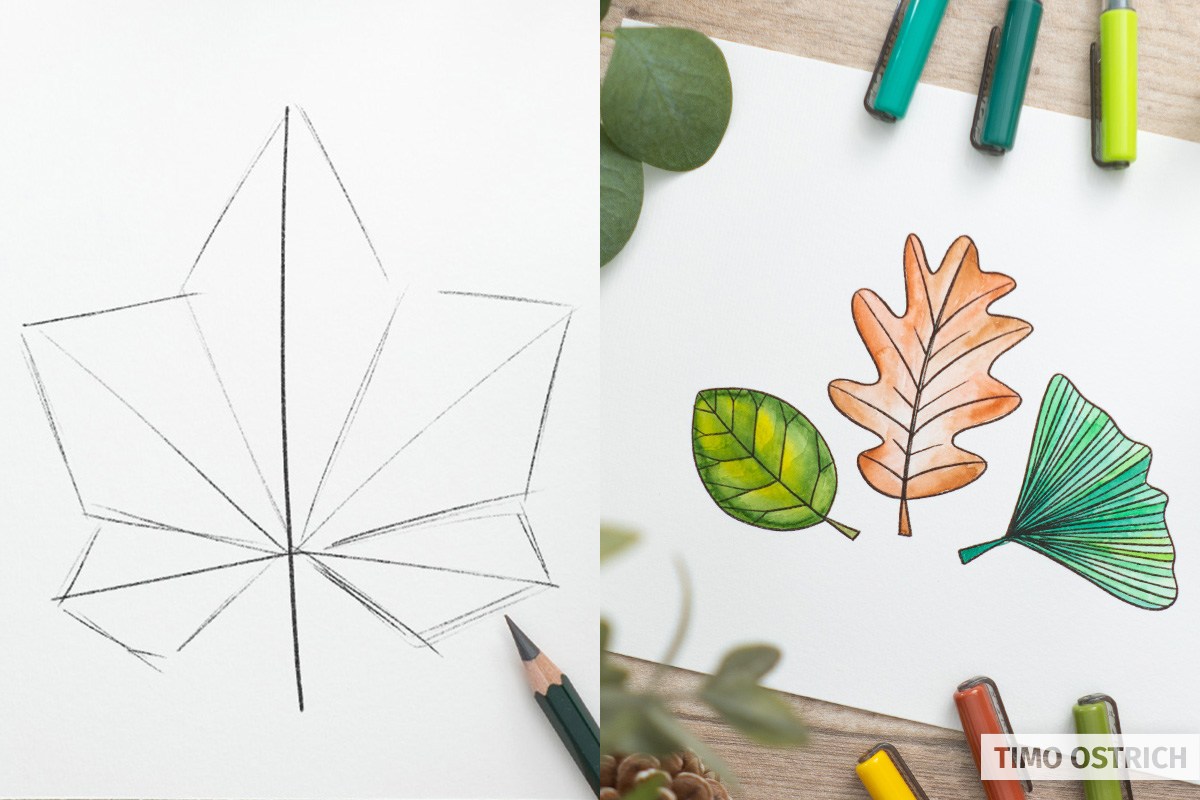
Abstracting using a Fineliner
First, you will learn how to draw leaves with the fineliner. We’ll try to focus on the prominent shapes and use just a few lines. Alternatively, you can of course first practice with the pencil or make a corresponding sketch.

- Start with a dynamic stroke. This defines the curve of the leaf and creates a line to which you can align the next steps.
- In the second step, draw the outline. Start either at the bottom, or at the top – depending on how it feels better to you. I like to leave a little space at the bottom to have the stem of the leaf directly in the appropriate curve.
- Then add the inner texture of the leaf, starting from your center line. Pay attention to the details and abstract if necessary. You can also widen the stem a bit in this step.
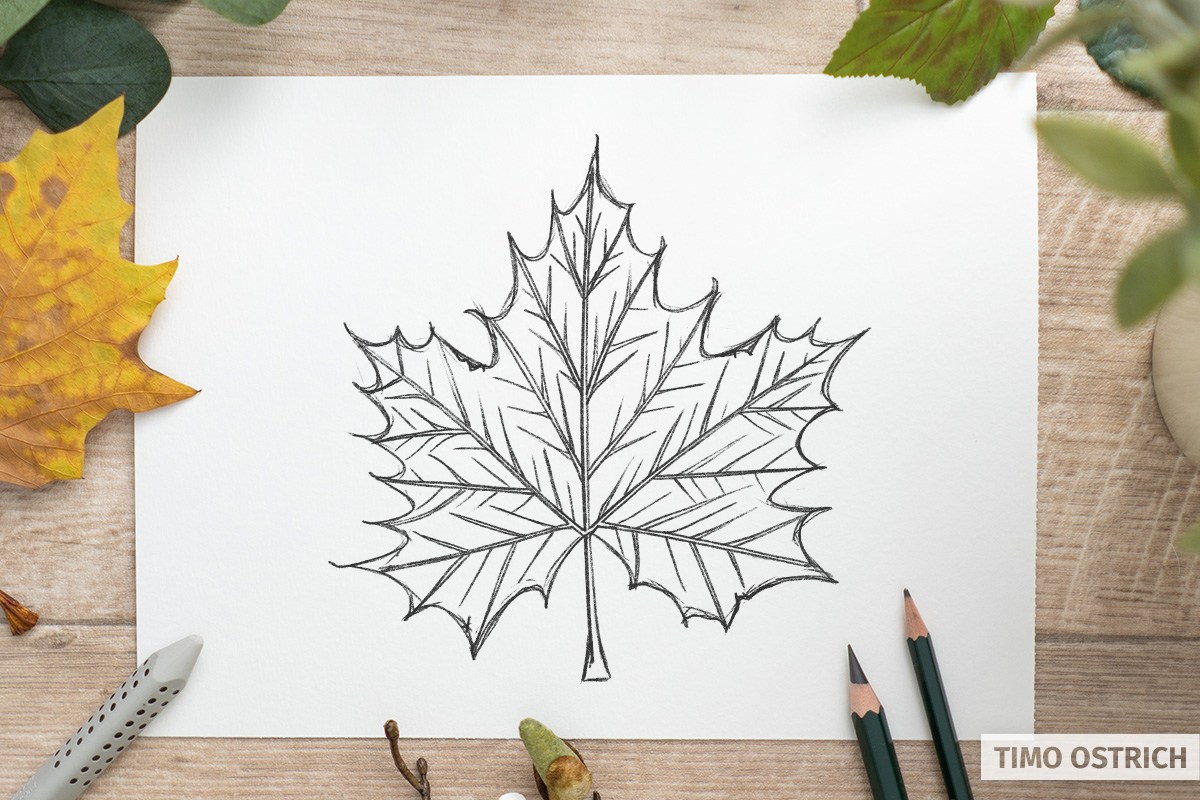
Reverse process for certain leaves
With some leaves it is easier to reverse the process. Then you first draw some lines of the inner texture after the base stroke.
Then you use these lines to draw the leaf outline. This works quite well for a maple leaf, for example. In the end, your personal feeling when drawing decides which approach you use!
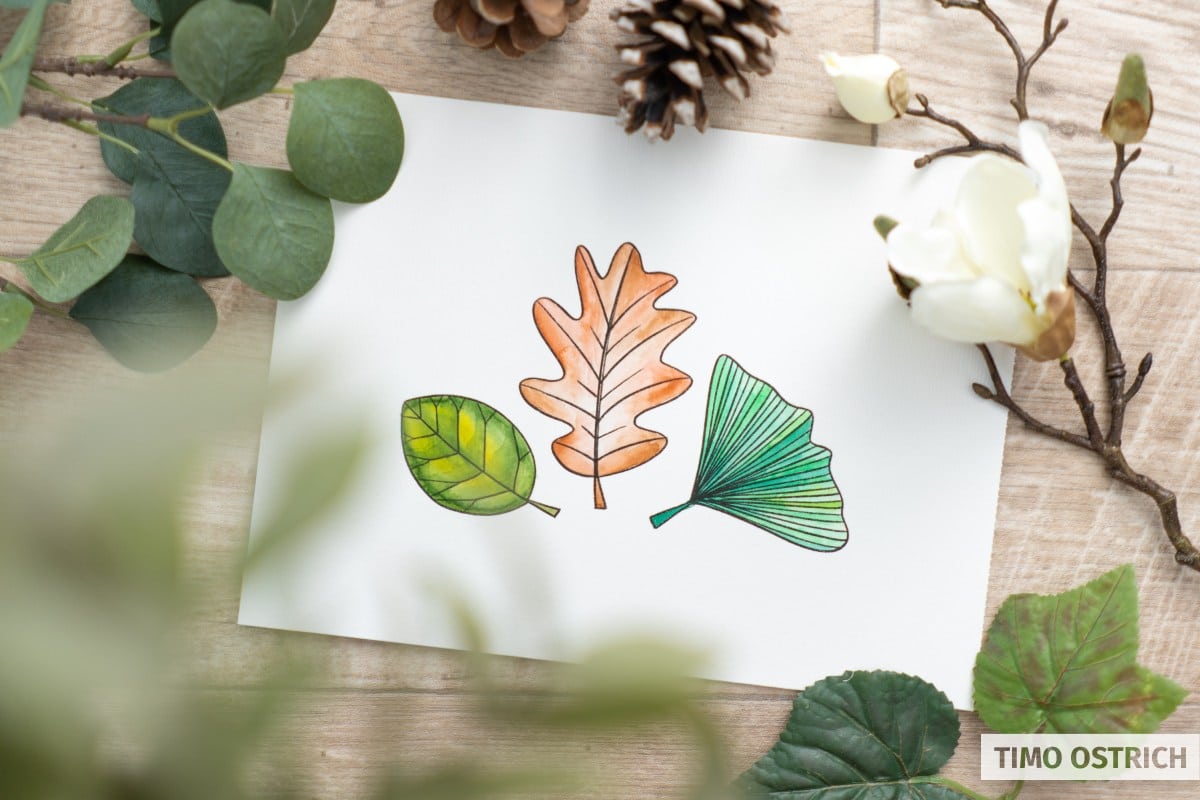
Adding colors
Last but not least, you can now add some color to your leaves! And thus also decide whether it looks more like spring or autumn.
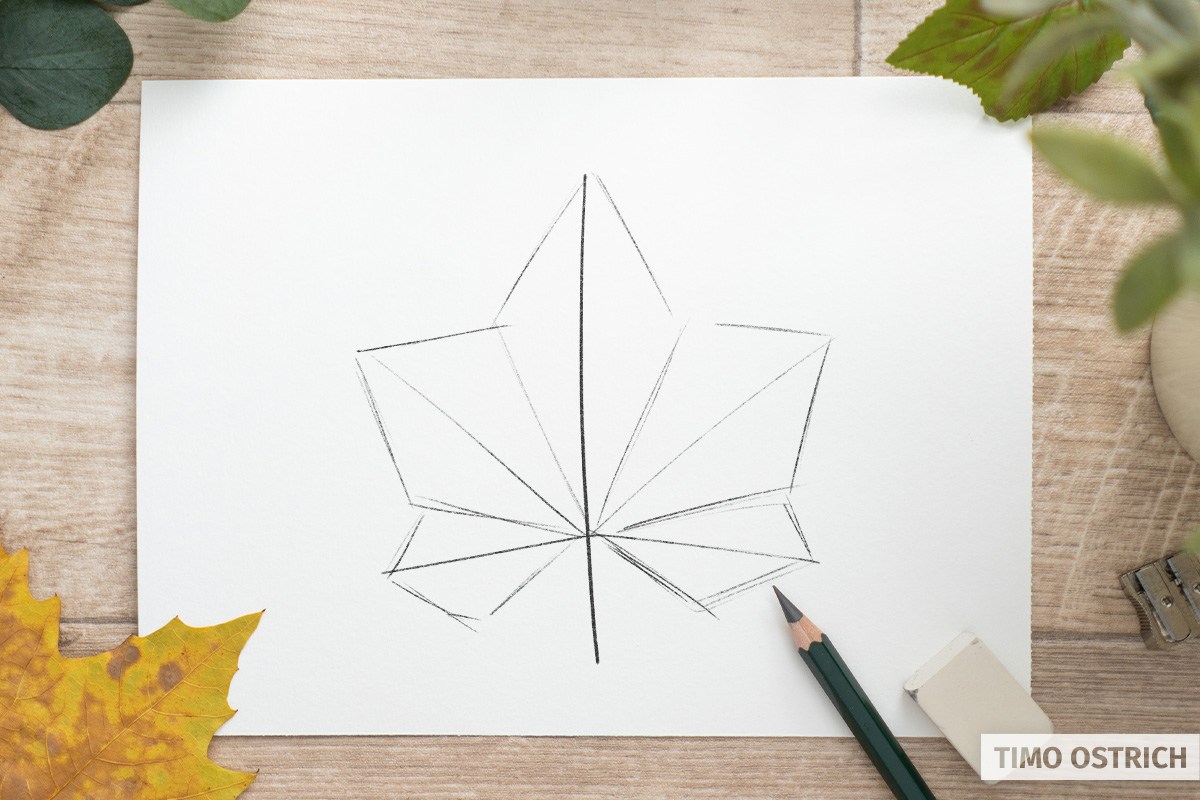
Drawing detailed leaves using a pencil
I also want to show you how to draw realistic leaves. With a pencil drawing, we want to show the details even more precisely and try to capture the leaf as accurately as possible on paper.
It is even more helpful to have an exact reference (for example a real leaf or a photo of it). And then you can get started.
With some rough basic shapes you define the form of the leaf. A first dynamic basic stroke can again be used as a guideline.
Refine the inside of the leaf with the first, prominent leaf veins. Use two fine strokes for this, so that the inside of the veins remains light and looks realistic.

Next, define the outline of the leaf more precisely. Use a real leaf as a guide and also let the lines guide you a little. Don’t try to get everything exactly right here.
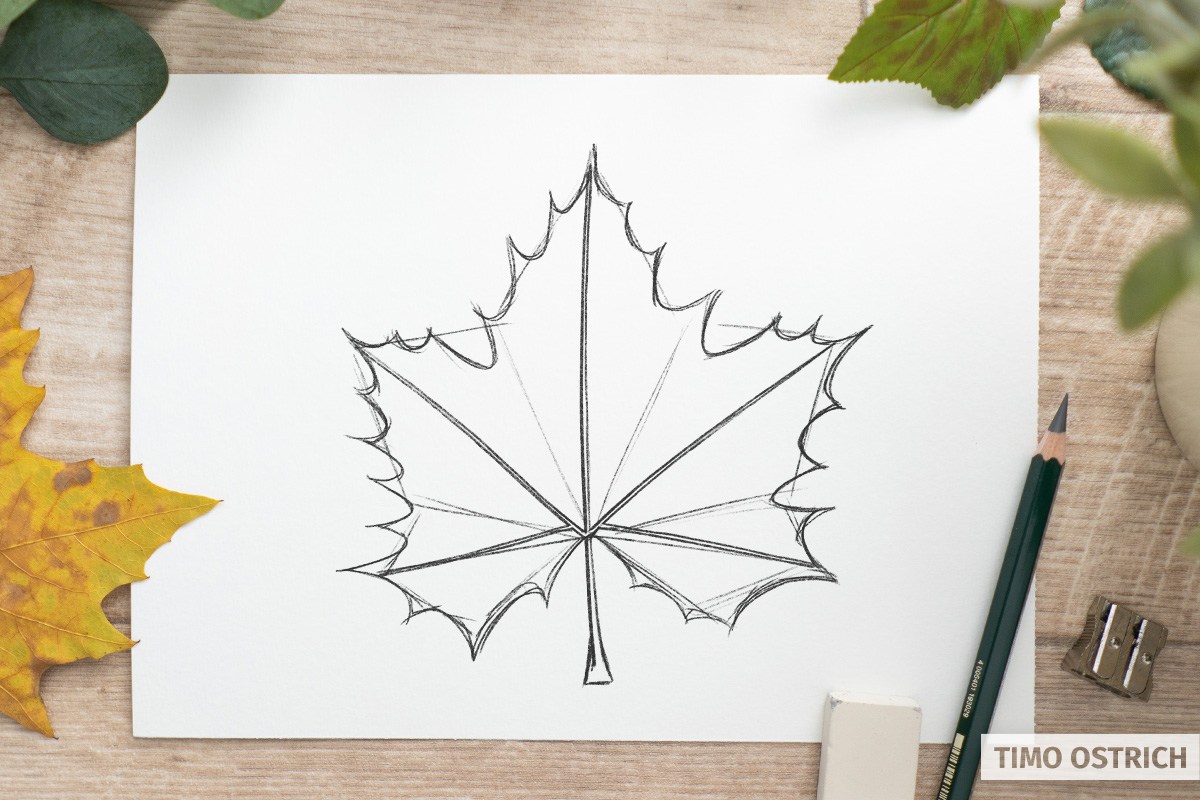
But also pay attention to the natural details of the leaf. Bent tips and pitted areas add realism to your drawing.

Draw the remaining leaf veins. Proceed calmly in individual layers. So first draw the primary branches …
And then the secondary branches and so on. This step can become very detailed and tedious! But the work is worth it and makes the result even more beautiful.

If necessary, set further accents with the pencil. Reinforce the shaping lines and create contrasts.

Start hatching the result. Make sure the light source is consistent and again work your way from rough to fine. I like to hatch in one direction first and then add cross-hatching later. Here, of course, you can also use other techniques to shade the areas differently.

Your drawn leaf is ready! The details come out great and the whole leaf looks very realistic. I added a few small elements around the outside to give the drawing some more life and dynamics. Now you know how to draw leaves and it’s up to you to modify the process to your needs or add some color again.
Leaves in compound
So far, we’ve only looked at individual leaves. But what if you want to draw whole bushes or trees? Here, too, the leaf shape (in combination with the tree) is crucial.
Whether you draw a detailed tree with hundreds of leaves, or just highlight individual leaves, the shape tells us what kind of tree it might be.
Often a few leaves are enough to catch the viewer’s eye and define the type of tree. The remaining leaves can be indicated by rough lines to define the shape of the tree.

PS: Can you guess the three tree species from the example drawing? Write your guess in the comments!
Using brushes for shaping
Last but not least, I have another variation for you on how to paint leaves. In this case, you do not meticulously reproduce details, but use the given way your drawing tool brings the color to the paper.
We are talking about brushes and watercolor painting. Depending on the tip of the brush, you almost automatically create charming leaves. As always, this looks easier than it is. However, sometimes this technique creates very realistic leaves within seconds!
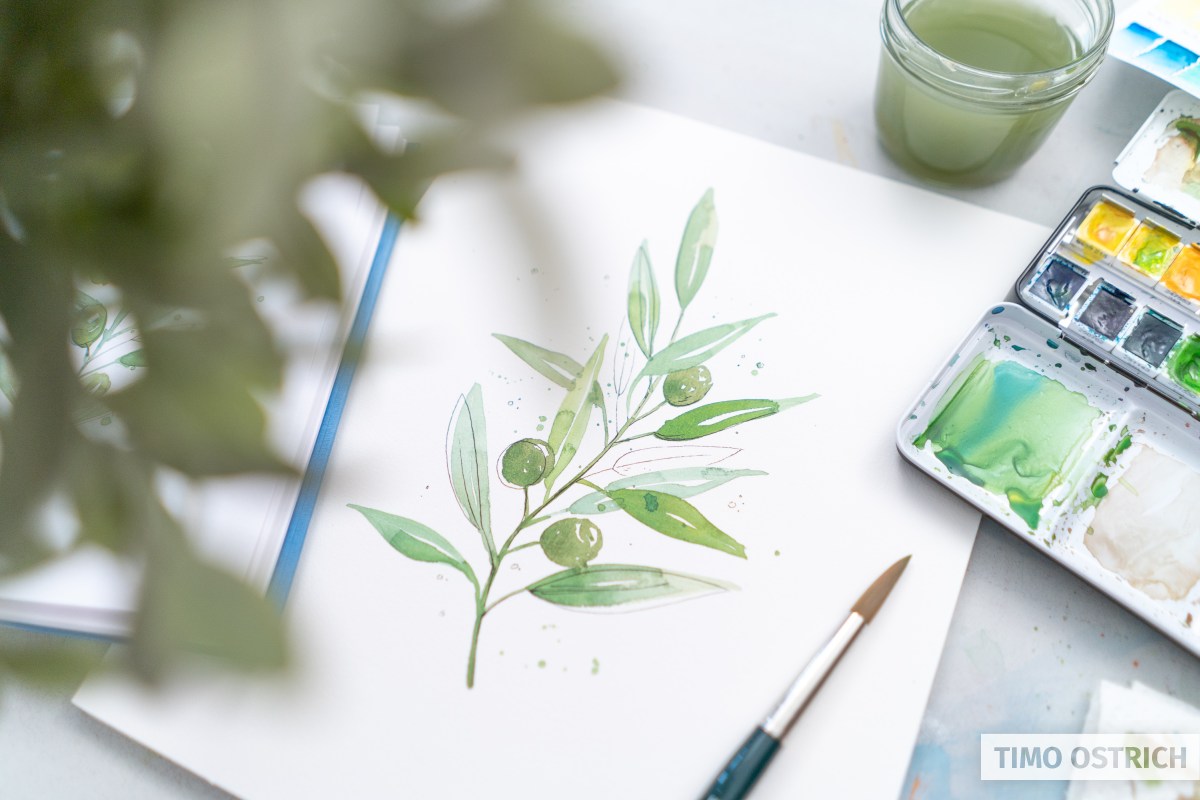
To achieve this, the combination of color, brush position and contact between brush tip and paper must be precisely coordinated. You will be rewarded with very natural-looking leaves and beautiful colors.